We all have those weeks when the workload is just too overwhelming and we often miss out on important tasks or information. This is why checklists are important. Checklists not only allow you to better organize your tasks but also ensures there are little to no errors.
Checklists also come in handy when you need to inspect, verify, or check something. From software requirements to product launch to dos- checklists are omnipresent.
Seeing how crucial they are in business activities, To help you get started, we’ve also added a ready-to-use checklist template at the bottom. But before we jump into our checklist template, let us quickly explore what a checklist actually is, what are some of the benefits of creating such lists, and what to include in a checklist. Read on…
What is a Checklist? (Definition)
A checklist is defined as a list of tasks that need to be completed either by yourself or your team. A checklist organizes items in a systematic manner and provides you with an overview of what tasks you need to accomplish instead of relying on your memory.
It’s a way to ensure everyone is on the same page with what needs to be completed and by when.
Checklist Anatomy: What Makes an Effective Checklist?
Not all checklists are equally effective. A well-designed checklist is more than just a list of tasks – it provides structure, clarity, and accountability. Whether you’re creating a personal to-do list or a business workflow, including the right elements makes your checklist easier to follow and more useful.
A well-structured checklist typically includes:
| Element | Purpose |
|---|---|
| Title | Clearly describes what the checklist is for. |
| Objective | Explains the goal or outcome you want to achieve. |
| Action Items | Lists each task as a clear, actionable step. |
| Priority (Optional) | Highlights the most important or urgent tasks first. |
| Owner (Optional) | Identifies who is responsible for completing each task. |
| Due Date (Optional) | Helps keep work on schedule and prevents delays. |
| Status | Shows whether a task is pending, in progress, or completed. |
| Notes (Optional) | Provides additional instructions, links, or context when needed. |
The simpler your checklist is, the more likely you’ll use it consistently. Focus on including only the information that helps you complete tasks efficiently without adding unnecessary complexity.
Now that you understand the checklist’s anatomy, let’s explore why using a checklist is essential for improving productivity, reducing errors, and managing tasks more efficiently.
Why are Checklists Important?
Understanding what a checklist is only tells half the story. The real impact comes from how it improves the way you manage tasks, projects, and daily responsibilities.
Checklists help make sure that tasks actually get completed, not just planned. By establishing a systematic checklist, you are bound to bring in clarity, ownership, timelines, and clear expectations. Everyone is aware of what needs to be done and when it should be completed. This reduces confusion and keeps work moving forward consistently.
Another major benefit of using a checklist is improved productivity. Instead of trying to recall every detail in your mind, you can write everything down in one organized place. This reduces mental overload and frees up your brain to focus on execution rather than recollection. In simple terms, a checklist acts as your external memory system.
Checklists also make delegation easier and more effective. When tasks are clearly outlined step-by-step, you can confidently assign responsibilities to team members without constant follow-ups. This saves time, improves accountability, and prevents costly mistakes.
Most importantly, a checklist gives you direction. It removes guesswork and eliminates the risk of skipping important steps. Whether you’re managing a project, planning content, running a business, or organizing daily tasks, a checklist keeps you aligned with your goal and helps you move forward with confidence.
In short, checklists are not just productivity tools; they are powerful systems for improving efficiency, accuracy, and results.
But not all checklists are created for the same purpose. Different tasks, projects, and workflows require different types of checklists to ensure maximum productivity and efficiency.
The Psychology Behind Why Checklists Work
Checklists don’t just help you stay organized – they also work with the way your brain naturally processes information. By moving tasks out of your mind and into a structured system, checklists reduce mental effort and make it easier to stay focused.
They Reduce Cognitive Load
Your brain has a limited capacity for holding and processing information at one time. Trying to remember multiple tasks while completing them consumes mental energy. A checklist acts as an external reference, allowing you to focus on completing work instead of remembering every step.
They Help Prevent Decision Fatigue
Every decision you make throughout the day requires mental effort. Without a checklist, you constantly ask yourself, “What should I do next?” A checklist removes that uncertainty by providing a predefined sequence of tasks, allowing you to move from one item to the next without unnecessary decision-making.
They Act as an External Memory System
Rather than relying on memory alone, checklists capture important tasks in a reliable place. This reduces the risk of forgetting critical steps, especially in complex projects, recurring processes, or high-pressure situations where small mistakes can have significant consequences.
They Reinforce Positive Habits
Checking off completed tasks provides visible progress and encourages consistency. Over time, repeatedly following the same checklist helps turn routines into habits. Whether you’re building a morning routine, following a project workflow, or onboarding new employees, checklists make it easier to repeat successful behaviors until they become second nature.
Ultimately, a checklist is more than a productivity tool – it’s a simple system that helps you think more clearly, work more consistently, and accomplish tasks with greater confidence.
So, now let’s explore our next section, where we’ll discuss the different types of checklists. Read on!!
Different Types of Checklists You Should Know
Let’s explore the different types of checklists you can use in your daily life, work, or business. Each type of checklist serves a unique purpose and helps you stay organized in a specific way.
1. To-Do Checklist
A to-do checklist is the most common type of checklist. It’s simply a list of tasks you need to complete within a specific time frame, like today, this week, or this month.
You might use a to-do checklist where you could plan your day-to-day tasks, organize in the office, keep track of assignments, or even personal goals. It helps you clearly see what needs to get done, prioritize important tasks, and feel a sense of accomplishment as you tick items off the list.
Simple, practical, and effective, that’s why the to-do checklist is a favorite productivity tool for many people.

How to Create a To-Do List the Most Effective Way! (Free Template) →
2. Process Checklist
A process checklist is used when you need to complete a task in a specific step-by-step order. Unlike a simple to-do list, this type of checklist focuses on following a structured process from start to finish.
For example, you might use a process checklist for onboarding a new employee, publishing a blog post, launching a product, or handling customer support requests. Each step is clearly defined, so nothing important gets missed.
A process checklist improves consistency, reduces errors, and ensures the same quality outcome every time the task is performed. It’s especially useful for teams that need a standardized workflow to stay aligned and efficient.
3. Project Checklist
The project checklist is aimed at controlling larger projects that include several steps, deadlines, and sometimes several individuals. This category is unlike a straightforward to-do checklist, as it is aimed at monitoring all that needs to be done to make a whole project a success.
For example, if you’re planning an event, launching a marketing campaign, developing a website, or managing a client project, a project checklist helps you break the work into smaller, manageable tasks. It ensures nothing slips through the cracks.
4. Compliance Checklist
A compliance checklist is applied to ensure that your tasks, processes, or business organization is done according to certain rules, laws, policies, or even industry standards. It assists you in keeping in line with the legal provisions and prevents expensive errors or fines.
For example, businesses may use a compliance checklist for workplace safety regulations, financial reporting, data protection policies, or quality standards. Each item ensures that every required guideline is properly followed.
A compliance checklist reduces risk, improves accountability, and gives you confidence that nothing important is overlooked. It’s especially important for organizations that must meet regulatory or industry-specific requirements.
5. Quality Control Checklist
A quality control checklist helps to uphold standards and make sure that a product, service, or task fits the required quality standards before it is completed or it is delivered.
For example, manufacturing teams access quality control checklists to examine products, content teams access quality control checklists to validate articles prior to publication, and service businesses access quality control checklists to validate customer satisfaction criteria. Every checkpoint is used to detect errors, defects, or any improvement requirements prior to completion.
6. Troubleshooting Checklist
A troubleshooting checklist is used to identify, diagnose, and fix problems in a systematic way. Rather than making guesses as to what might have gone wrong, this form of checklist takes you through the potential causes in a step-by-step manner.
For example, IT teams use troubleshooting checklists to resolve technical issues, customer support teams use them to handle complaints, and businesses use them to solve operational problems. With each step, one can narrow down the problem till the underlying cause is found.
A troubleshooting checklist saves time, reduces confusion, and ensures problems are solved efficiently. It brings structure to problem-solving and helps you respond quickly and confidently when challenges arise.
Now that you’ve explored the different types of checklists and how each one serves a unique purpose, the next step is learning how to create a checklist that actually works for your needs. So, let’s move on to the next section to see how you can create a checklist step-by-step.
Explore More Business Checklists:
How to Create a Checklist? (Step-by-Step)
Step 1 – Define the Purpose
Before you jump into writing down every task you can think of, take a step back and ask yourself: what do I want to achieve with this checklist? What is the overall goal?
Think of a checklist as a roadmap. Just like any good trip, you need a destination in mind before you can figure out the route. The purpose of your checklist is your destination. Knowing this will help you decide which roads (tasks) to include and which ones to skip.
For example, let’s say you’re making a checklist for an upcoming camping trip. The purpose could be “to have a relaxing and enjoyable camping trip.” With this goal in mind, you can create a checklist that focuses on the essentials: packing tent, sleeping bag, food, and drinks. You can skip things that aren’t crucial for relaxation, like bringing a fancy camp chair or a specific type of lantern.
Here are some other examples of purposes for checklists:
- Completing a work project: The purpose might be “to finish the XYZ report by Friday.”
- Running errands: The purpose could be “to pick up groceries, dry cleaning, and medicine by lunchtime.”
- Following a recipe: The purpose here is simply “to bake a delicious chocolate cake.”
The clearer your purpose, the more focused and effective your checklist will be. It will ensure you’re staying on track and tackling the tasks that truly matter to achieve your goal. So, before you start listing everything you can think of, take a moment to define the purpose of your checklist. This small step will make a big difference in its usefulness.
Step 2 – Give it a Title
Just like any document, your checklist needs a clear and concise title. This title acts like a signpost, instantly telling you and anyone else what the checklist is all about. An effective title should accurately reflect the purpose of your checklist and make it easily identifiable later on.
Imagine you have a bunch of different checklists lying around. With a clear title, you can quickly scan and grab the exact one you need, saving you time and frustration. For example, if you have a checklist for an upcoming party, a good title might be “Birthday Party Preparations To-Do List”. This title instantly tells you what the checklist is for and what tasks it includes.
Here are some additional tips for crafting a great checklist title:
- Keep it short and sweet: Aim for a title that’s easy to read and remember. A long, convoluted title will defeat the purpose of being clear and concise.
- Be specific: The title should give a clear idea of what tasks the checklist covers. Don’t just use a generic title like “To-Do List”. Instead, use something more specific like “Errands To-Do List for Today”.
- Use keywords that make sense to you: If you might need to search for this checklist later, include keywords that you’d naturally use to find it. For instance, if it’s a checklist for packing for a trip, you could use “Packing List for [Destination] Trip”.
Step 3 – List the Tasks
Now that you’ve identified your goal and named your checklist, it’s time to dive into the most crucial step: listing the actual tasks you need to complete. This step is the core of your checklist, serving as the detailed roadmap that guides you towards achieving your objective.
To start, ensure that each task on your list is clear and concise. Each item should represent a single, well-defined action. Instead of vague statements like “clean the room,” be specific with tasks such as “dust furniture,” “vacuum carpet,” and “mop the floor.” This clarity prevents confusion and ensures you know exactly what needs to be done.
Using action verbs at the beginning of each task helps to specify what needs to be done. Verbs like “wash,” “pack,” “purchase,” or “assemble” provide clear instructions and leave no room for misinterpretation. These verbs set a clear direction for each task, making it straightforward and actionable.
It’s important to dedicate one line to each individual task. Avoid combining multiple tasks into a single line, as this can make your checklist cluttered and overwhelming. Separating tasks into individual lines makes it easier to read, check off completed items, and track your progress efficiently.
When listing your tasks, think about their sequence. If your tasks follow a natural order, list them accordingly. For example, if you’re creating a grocery shopping list, you might start with fresh produce, then move on to packaged goods, and finally, frozen items. This sequential approach ensures a smooth and efficient workflow.
Don’t hesitate to get specific with your tasks. The more detailed you are, the better. If a particular task requires additional details, include them within the task description. For instance, instead of just writing “pack clothes,” specify “pack 2 pairs of jeans, 3 t-shirts, and 1 pair of pajamas.” This level of detail helps to ensure nothing is overlooked and provides clear guidance on what exactly needs to be accomplished.
Step 4 – Prioritize (Optional)
While not every checklist needs prioritization, this step can be a game-changer for complex tasks or situations with deadlines. Here’s how to tackle prioritization effectively:
Identify the Urgent and Important: Think about each task on your list. Is it something that absolutely needs to be done by a specific time (urgent)? Or is it something crucial to the overall goal but has some flexibility in timing (important)? Ideally, you want to complete both urgent and important tasks first.
Use a Numbering System: Once you’ve identified urgency and importance, consider assigning a simple number system to your tasks. Start with “1” for the most critical task (urgent and important) and continue numbering down the list in order of decreasing importance or urgency. This will give you a clear visual of what needs your immediate attention.
Consider Dependencies: Are some tasks dependent on others being completed first? For example, packing for a trip might require you to have already booked your flight. Make sure to prioritize tasks that act as prerequisites for others.
Be Flexible: Life throws curveballs, so be prepared to adjust your priorities as needed. If something urgent pops up, re-evaluate your list and move the new urgent task to the top.
Remember, prioritization is a tool to help you stay focused and efficient. Don’t get bogged down in over-analyzing – a simple system is better than none at all. With a prioritized checklist, you’ll be well on your way to conquering your to-do list with confidence.
Step 5 – Choose Your Format
Now that you’ve got your checklist content all lined up, it’s time to decide where you’ll keep it. The format you choose depends on how you plan to use the checklist. Here are some popular options to consider:
Paper Checklist: This is a classic choice, perfect for situations where you don’t need digital access. You can use a simple notebook, a pre-printed checklist template, or even a sticky note! Paper checklists are great for quick to-do lists, grocery shopping trips, or tasks you need to keep nearby throughout the day.
Digital Checklist: The digital world offers a variety of options for creating checklists. You can use dedicated checklist apps, project management tools like Trello or Asana, or even simple word processing software like Microsoft Word or Google Docs. Digital checklists are ideal for complex projects with many subtasks, as they often allow for features like due dates, reminders, and progress tracking.
To save you time:
Check this helpful To-Do List template you can use right away →
Spreadsheet Checklist: Spreadsheets are another flexible option for digital checklists. They offer a structured format where you can easily add or remove tasks, categorize them, and even use formulas to automate calculations. Spreadsheets work well for detailed checklists that involve numerical data, like budgeting or packing for a trip with specific weight or quantity requirements.
Mind Map Checklist: Mind maps are a visual way to organize your checklist. They start with a central topic (your main goal) and branch out with subtasks and details. Mind maps are helpful for brainstorming and seeing the bigger picture of your project. There are dedicated mind mapping apps available, or you can even sketch one out by hand.
Need the right tools to map ideas better?
Try 9 Powerful Mind Mapping Software & Tools →
The Right Choice for You:
The best format depends on your personal preference and the specific needs of your checklist. Consider these factors:
- Accessibility: How will you access the checklist most often? Do you need it on the go, or will you have access to a computer?
- Complexity: How many tasks are involved? Do you need additional features like due dates or progress tracking?
- Collaboration: Will you be sharing this checklist with others? If so, choose a format that allows for easy sharing and editing.
No matter which format you choose, remember to keep your checklist clear, concise, and easy to follow. A well-formatted checklist will be your trusty companion in getting things done!
Most people create a checklist in physical notebooks or notepads. Using notepads or any paper document is not very scalable as there are high chances of misplacing the information and is there no sense of collaboration in case you want to share tasks with your team members.
Using a checklist tool can do wonders for your checklists and the tasks can easily be shared amongst your team members. This is where Bit comes in…
Bit.ai: The Best AI-Powered Collaboration Platform
Bit.ai is an AI-powered docs, wikis, and knowledge management platform for teams to manage all their documentation work. If you are looking for a new, advanced yet simple editor to jot down your checklist items and tasks, look no further!
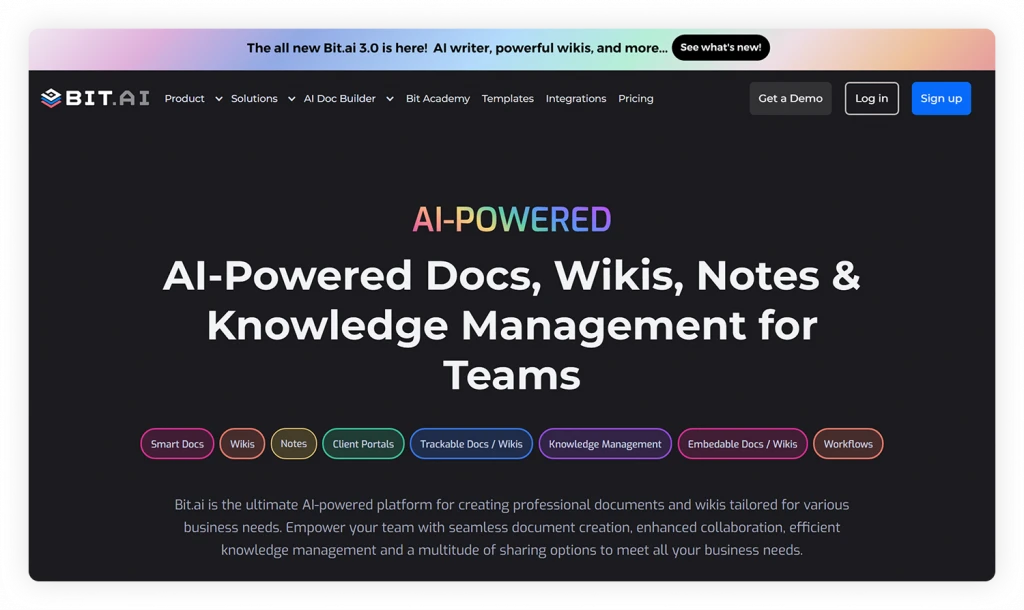
Bit.ai’s smart, minimal editor is perfect for distraction-free note-taking and to-dos. One of the best parts is that all the digital assets you need to get work done can be included seamlessly (files, images, editable visual web links, rich embeds, etc.)
Bit.ai has an amazing UI that’s easy to understand for a new user, making onboarding easier. The user experience is phenomenal, too, as things flow from documents to workspaces swiftly.
No matter if you want to create a checklist for personal use or professional use, Bit’s amazing organizational capabilities help arrange your information easily. Here’re are some more features offered by Bit.ai to help you get a better understanding of what Bit.ai is.
✔️ Create an Interactive Document: Easily bring in content from over 100 applications that will live inside your checklists. Add Excel spreadsheets, PDFs, Google Forms, Gantt charts, Maps, YouTube videos- basically anything on the internet with a link, and Bit will automatically convert that into live content living inside your document!
✔️ Collaborate in real-time: Multiple people can simultaneously collaborate on a Bit smart document in real-time. It’s a great way for employees to assign to-dos, discuss project details, work on spreadsheets, brainstorm ideas, collaborate on documents, share assets, and more. Bit’s sleek, minimal, and distraction-free editor makes a great tool for documentation.
✔️ Multiple ways to share: Bit.ai documents can be shared in a live state, meaning that all changes that you make to the document will update in real-time. If you are sharing your checklists with clients, they will always get your most up-to-date changes.
You can even embed Bit.ai docs on any website or blog. Since Bit documents are rendered and are responsive, any changes made to the checklists will reflect live on the site! Moreover, features like document tracking, password protection, file access restrictions, etc., help keep your checklists and other workplace documents safe.
✔️ Collaborative Workspace: Bit.ai provides a collaborative workplace for team members and executives to collaborate, share their knowledge, brainstorm ideas, and innovate together. The best part is that this data is safely secured in your workspaces and can be shared (or kept private) with anyone in your organization!
Here are some of the main benefits of using Bit.ai:
- Collaborate in real-time
- Interlink process documents
- Create fully responsive documents
- Create private smart goals only visible to yourself or your team
- Track engagement on shared SMART Goals with clients, partners, etc.
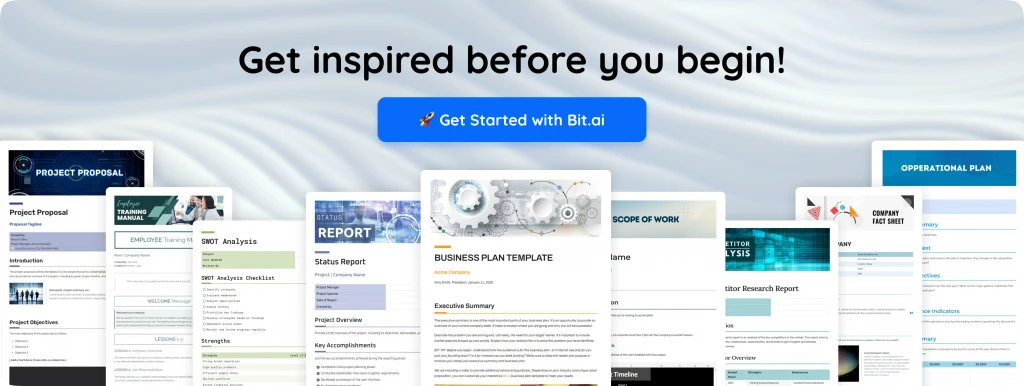
Now that you understand what Bit.ai is and how it helps you create organized, collaborative documents, let’s put that knowledge into action. Here’s a ready-to-use checklist template offered by Bit.ai to help you get started.
Ready-to-Use Checklist Template
To make the process of creating checklists easier, we have created a ready-made Checklist template for you! Check it out below:

FREE TEMPLATE
The Checklist Template Teams Use to Stay Organized
Includes tasks, priorities, deadlines, owners, & completion tracking.
✔ Pre-built checklist sections
✔ Customize once. Reuse anytime.
✔ Teams, Managers, Operations & Projects
Takes under 1 minute • Trusted by teams at startups & enterprises
Now, in the next section, we’ll explore how you can use this checklist template from Bit.ai. So, let’s get started.
How to Use the Checklist Template with Bit.ai
The process of creating a checklist document on Bit.ai is insanely easy! Just follow these four simple steps to create a checklist document quickly:
Step 1: Create a Bit Account
Go the home page of Bit.ai and click on Get Started for Free or Sign Up to get started. Enter your email address to sign up. Once in, you can create your personal profile.

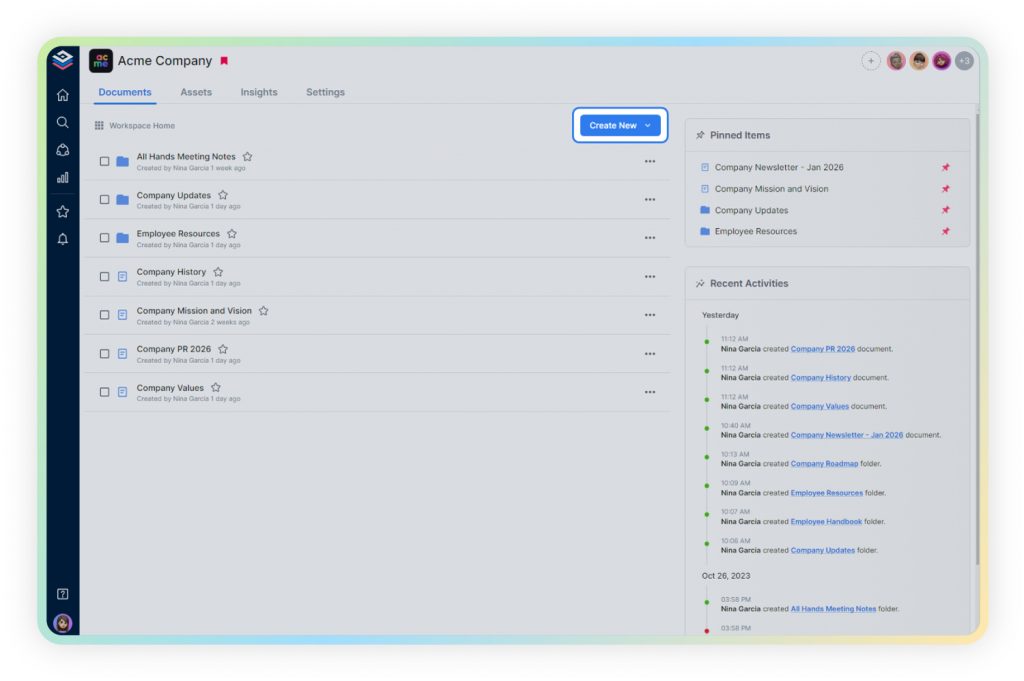
Step 2: Create a Workspace
Workspaces are where the work gets done. Click on the ‘Create Workspace’ button on the right. A popup will show up prompting you to add a name for your new workspace.

You can create a workspace around a team, department, large project, client, partner, etc. Inside each workspace, you can create an unlimited amount of Bit documents and access your content library (storage area for all of your digital assets – web links, files, cloud files, rich embeds, etc.).
Step 3: Add Team Members
Bit allows your team members to collaborate in real-time and get work done. Collaboration starts at the workspace level.
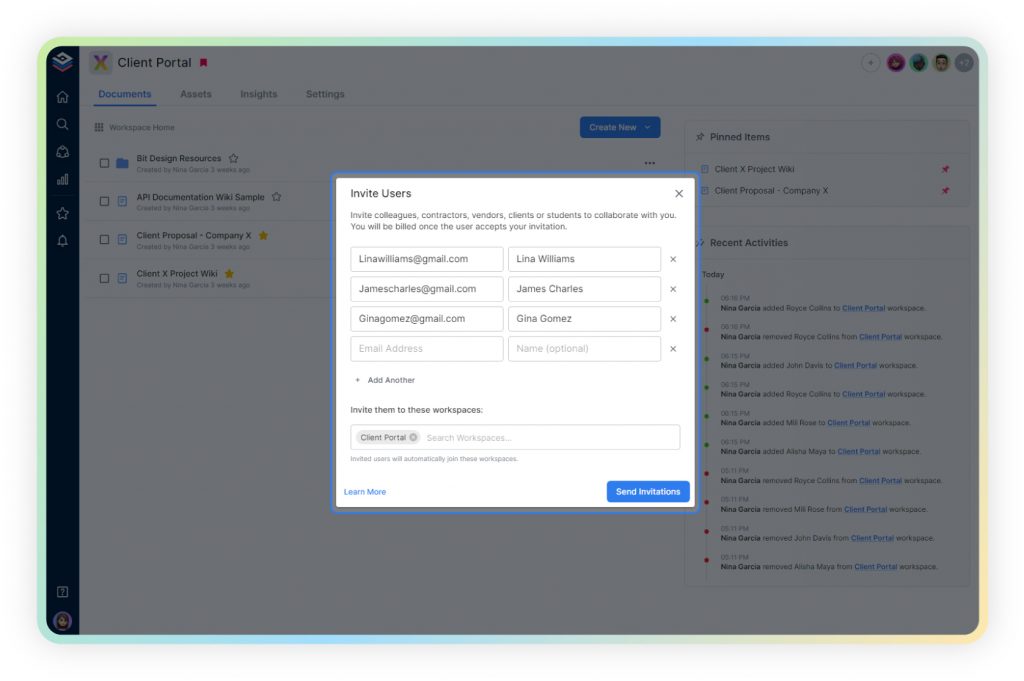
You create private workspaces by default. However, you can invite others to join you inside of a workspace and collaborate together with the knowledge, projects, documents and content inside of the workspace.
Step 4: Create Your Desired Document
Once you are in the workspace, click on the ‘Create New’ button. Select ‘From Template’ in the dropdown. A pop up will display allowing you to select a template from the gallery.
In the search box on the top left corner, you can search for “checklist template”. Once your desired template pops up, click on it and click on the “Use Template” button on the bottom right corner.
That’s it! Your checklist document is ready for use!
Watch this video to learn more?
Now, creating a checklist is easy, but creating one that improves productivity, reduces errors, and keeps tasks organized requires a few smart strategies.
Let’s look at some best practices you should follow while creating a checklist.
Best Practices for Creating an Effective Checklist
Creating a checklist is simple. Creating an effective checklist is where the real difference lies.
A good checklist should make your work easier, not more complicated. It should guide you clearly, save time, and help you stay focused. Here are some best practices to make sure your checklist actually works.
1. Be Clear and Specific
Rather than just writing a generalized checklist with tasks, such as “Work on project” or “Fix issue,” instead write specific, actionable tasks such as “Draft the outline of project,” “Design homepage wireframe,” or “Resolve the error in login page.” The more focused the task, the easier it is to act at once.
When the items in the checklists are clear in what should be done, the hesitation is minimized, mistakes are reduced, and there is better completion of tasks.
2. Keep It Simple
Your checklist should feel light, not overwhelming. Break big tasks into smaller, manageable steps. If it looks too long or complicated, people are less likely to use it consistently.
3. Organize Tasks in a Logical Order
You can arrange what you need to do in the order of doing it. An effective checklist should be organized hierarchically, so that it enhances the workflow and eliminates confusion.
4. Group Related Tasks Together
In case your checklist is long and has many areas, you may subdivide it into sections. One example is planning, execution, and review. This eases its understanding and comprehension.
5. Make It Easy to Update
Work changes. Processes evolve. So, the checklist you have must be dynamic enough to modify whenever there is a necessity. Periodical changes to the checklist make it relevant and useful.
6. Test It in Real Situations
Before finalizing your checklist, use it. See if any steps are missing or unclear. Practical testing helps you refine and strengthen it.
7. Don’t Overload It
A checklist should not hold you back; it should help you to be productive. So, focus on essential steps. The excess of too many objects may decrease efficiency. The most practical checklist would be the one that is easy to use at the end of the day.
Well, even when you follow best practices, small errors can reduce the effectiveness of your checklist. In fact, many checklists fail not because the idea is wrong, but because of avoidable mistakes in structure and planning.
Before you finalize your checklist, it’s important to know what not to do.
Stay Organized with These Personal Checklists:
Common Checklist Mistakes to Avoid for Better Productivity
Even the best checklist can fail if it’s poorly designed. Sometimes, small mistakes reduce clarity, slow down workflow, and defeat the whole purpose of improving productivity.
Here’s a simple “Don’ts” checklist to help you avoid common errors when creating your own checklist:
❌ Checklist of What Not to Do
- Don’t write vague or unclear tasks
- Don’t make the checklist too long and overwhelming
- Don’t add unnecessary or repetitive steps
- Don’t ignore the logical order of tasks
- Don’t create one checklist for everything
- Don’t forget to review and update it regularly
- Don’t skip testing the checklist before final use
- Don’t overload it with too much detail
- Don’t make it difficult to edit or share
- Do not depend solely on retaining these procedures in your mind and instead, document them properly
Avoiding these common checklist mistakes will help you create a clear, effective, and productivity-focused checklist that actually gets used, not ignored.
Final Words
Whether you need a tool to create checklists, create tasks and to-dos, document your ideas, or brainstorm on an upcoming project, Bit is there for your every need.
If you are looking for well-rounded, easy-to-use documentation that can be used for both personal as well as professional tasks, Bit is the perfect software for you. If you need any help with our checklist template or want to know how Bit can help your business, let us know by tweeting us @bit_docs. Cheers!
FAQs
- What is a checklist, and why should I use one?
A checklist is simply a list of tasks or steps you need to do. It takes those loose thoughts out of your head and puts them on paper (or a screen) so you don’t forget anything important.
- How do I start making a checklist?
Start by figuring out the purpose: what do you want to get done? Once your goal is clear, give your checklist a simple, clear title so you know what it’s for at a glance. This helps you stay focused.
- How should I write each item on the checklist?
Make every item a single, clear action—no vague or combined tasks. Use strong action words like “pack,” “call,” “review,” or “submit.” This way, it’s obvious what needs to be done, and checking items off feels satisfying.
- What are the real benefits of using a checklist?
Checklists are an effective way to save time and mental energy. They help prevent mistakes or missed steps, make work more efficient, and give you a sense of accomplishment when you tick off items. Over time, they improve your productivity and reduce chaos.
- Should I use a digital checklist or a paper one?
The choice between these two really comes down to personal preference, as each option has its advantages and disadvantages. Digital checklists are handy if you want reminders, easy edits, or something you can share with others. Paper checklists are great when you want something simple and distraction-free. Go with the option that you’ll actually use consistently.
About Our Editorial Team
Our Editorial Team researches, writes, and reviews every article to help ensure it is accurate, practical, and up to date. To learn more about our editorial standards, content review process, and official social media profiles, visit our Editorial Team page.
Why Trust This Article?
The information in this article is based on reputable and authoritative sources. We review our content periodically to keep it accurate and up to date.
Keep reading & learning: