Not long ago, people used to buy products and software at face value. There was no tangible feedback loop between developers and users. Now, of course, the dynamics of product delivery have altered drastically, from old-school software CDs delivered once a year to buying software on a weekly basis!
With such frequent product distribution, the need for a communication channel between the user and product becomes important, to convey upcoming features, changes, improvements, and enhanced user experience. This communication channel is called “Release Notes”.
Release notes serve as the perfect way for companies to be honest about their development efforts and transparent with their customers. Also, release notes help you stand out from the competition by showcasing your latest releases intuitively and easily to the users.
Crafting high-quality release notes can be a little daunting. Well, don’t worry! We are here to help you on this journey of creating interactive release notes with all the necessary components. But, before that let’s dig into learning more about what are release notes and why they are important?
What are Release Notes? (Definition)
Release notes explain new features added, issues resolved, and improvements in a product or software by the company.
It’s an important way of understanding the current state of a platform, see past updates and release versions.
This document also supports the process of maintaining end-user experience, user guides, and training materials.
Release notes are usually written by:
- Developer
- Quality Assurance (QA) analysts
- Technical writer
- Product manager
- Marketer
Why is Release Notes Documentation Important?
Release notes are an important way of communicating updates made to a platform to the end-user and internal team.
It’s an organized way of showing what’s new, what’s been fixed, what improvements have been made, share additional resources, and help guides.
Release notes also act as a direct line of communication with your power users and loyal customers.
If used effectively, they carve out a unique engagement channel for your users that will keep them thrilled about what’s coming next.

If this was useful, read this…
What is a Product Requirements Document & How to Create One Effectively? →

Manage All Your Docs in One Place with Bit.ai
Create, organize, and share release notes, specifications, and documentation effortlessly with Bit.ai.
Free to start • Set up in minutes
How to Write Release Notes? Follow these steps:
Release notes are like mini-instruction manuals for your users. They tell them what’s new, what’s fixed, and anything else they might need to know about your latest software update. But before you dive into the exciting new features, it’s important to lay a solid foundation. That’s where Step 1: Start with the Basics comes in.
Step 1: Start with the basics
Here’s what you need to include in this first step:
1. Version number and release date
This seems simple, but it’s crucial information. People need to know exactly which update they’re looking at and when it was released.
2. A clear and concise title
Keep it short and informative. For example, if the update focuses on bug fixes, you could title it “Version X.X.X – Bug Fixes and Performance Improvements.
3. A brief overview
In a sentence or two, summarize the key changes in this update. This is a great way to grab users’ attention and let them know if the update is relevant to them.
Here’s an example to illustrate these points:
Title: Version 2.4.1 – Bug Fixes and Performance Improvements Release Date: July 22nd, 2024 Overview: This update addresses several reported bugs and improves the overall performance of the app.
This short and sweet introduction sets the stage for the rest of your release notes. It tells users what version they’re dealing with, when it came out, and what to expect from it. By starting with these basics, you ensure everyone is on the same page before you delve into the details.
Step 2: Focus on the user
Imagine you’re explaining exciting news to a friend about your favorite app. That’s the mindset you want to have when writing Step 2 of your release notes: Focus on the User. This means ditching technical jargon and developer speak in favor of clear, concise language that highlights how the update benefits your users. Here’s how to make this step shine:
1. Think “What’s in it for me?”
Instead of listing every technical detail behind a new feature, explain what problem it solves for your users. For example, instead of saying “Implemented a new search algorithm,” say “We’ve improved search results to make finding what you need faster and easier!”
2. Use “you” and action verbs.
Shift the focus from what the developers did to what the user can now do. Use words like “you can now,” “this allows you to,” or “get ready to.”
3. Highlight benefits, not features.
Don’t just list features; explain how they make the user’s life easier. For instance, don’t just say “Added a dark mode toggle,” say “Now you can enjoy a comfortable reading experience at night with our new dark mode!”
4. Use real-world examples.
Help users understand how to use the new features by providing concrete examples that fit their needs.
5. Keep it positive!
Focus on the improvements and new possibilities this update brings.
Step 3: Structure your content
We’ve covered the initial steps of writing release notes: establishing the who, what, and why. Now, let’s focus on how to organize your content for maximum user benefit. Release notes are essentially mini-newsletters for your product, so a clear structure is crucial for keeping users informed and engaged.
Here are practical tips to structure your release notes effectively:
1. Headings and Subheadings as Signposts
Divide your content into distinct sections using headings and subheadings. This acts like signposts on a highway, making it easy for users to scan and find the information most relevant to them. Common sections might include “New Features,” “Bug Fixes,” “Improvements,” and even “Known Issues” if applicable.
2. Bullet Points for Quick Bites
Embrace bullet points! They’re your allies in breaking down complex information into easily digestible chunks. Use bullet points to list new features, bug fixes, and other changes. This allows users to quickly grasp the key details of each update.
3. Prioritize Information for User Focus
Put the most important information at the forefront. This could be the most exciting new feature, the most critical bug fix, or anything you believe will have the biggest impact on users.
4. Logical Flow for Smooth Understanding
Consider the order in which users will likely read the information. For example, if a new feature relies on a previous bug fix, mention the bug fix first. This ensures a smooth understanding of the overall changes implemented.
5. Keep it Simple for Broad Understanding
Avoid technical jargon and overly complex sentences. Remember, your goal is to inform a broad audience, so use clear and concise language that everyone can understand.
Struggling with release notes wording? Let Bit.ai’s AI Writer draft it for you.
Step 4: Provide context
Forget just listing changes in your release notes! They should be a conversation explaining why these changes matter to your users. Here’s how to breathe life into your release notes by providing context:
1. Explain the “Why” Behind the Changes
Don’t leave users wondering what prompted the update. Tell them what problem it solves or what need it addresses.
Instead of a dry “Implemented a search bar for the product catalog,” explain the user frustration: “We’ve listened to your feedback and added a search bar to the product catalog. This makes finding what you’re looking for a breeze, saving you valuable time.”
2. Highlight User Benefits
Shift the focus to how users will be better off. Don’t just say “Improved performance for faster loading times.” Emphasize the positive impact: “We’ve made improvements under the hood to boost the app’s performance. This means faster loading times for a smoother overall experience, so you can get what you need done quickly.”
3. Address Potential Concerns
Anticipate how some changes might cause confusion or disruption. Acknowledge potential user concerns and address them head-on.
4. Make context flow smoothly
- Clear and Concise Language: Ditch technical jargon that might leave users lost. Write in a way that’s easy for everyone to understand.
- Paragraph Power: Break up the text with clear and concise paragraphs, making it easy to digest the information.
- Visual Aids (Optional): Consider including screenshots or short videos for visual learners. These can demonstrate the new feature or change in action.
Step 5: Link to further resources
Sure, you can list the new features and bug fixes, but providing context helps users understand the “why” behind the changes. This makes the information more meaningful and helps users get the most out of the update.
Here’s how to provide context in your release notes:
1. Explain the “why” behind major features
Did users request this feature frequently? Is it part of a larger product roadmap? A quick explanation shows you’re listening to user feedback and working towards a specific goal.
2. Highlight the benefits
New features are great, but what problems do they solve for users? Explain how the update will make their lives easier or more efficient.
3. Address potential concerns
If a major change might disrupt user workflow, acknowledge it and offer solutions. Are there workarounds or tutorials available to help users adapt?
Here’s an example:
Without context: “We’ve added a new tagging system to help you organize your files.”
With context: “We’ve listened to your feedback and implemented a new tagging system to help you organize your files more effectively. Now you can categorize files with custom tags, making it easier to find what you need quickly. For a quick walkthrough on using tags, check out our new help article!”
Step 6: Maintain a clear and concise tone
Maintaining a clear and concise tone in release notes is crucial for ensuring that the information is easily understood by all users. The primary goal of release notes is to communicate updates, fixes, and enhancements in a way that is straightforward and actionable. To achieve this, it’s important to use simple language and avoid unnecessary jargon.
Begin by being direct and to the point. Each sentence should convey a single idea or piece of information. Avoid lengthy explanations and technical terms that might confuse the reader. Instead, use straightforward language that gets straight to the heart of the matter. For instance, rather than saying, “We have implemented a feature that significantly improves the efficiency of our application’s data processing capabilities,” simply state, “We’ve added a feature that speeds up data processing.”
Be mindful of the structure of your content as well. Organize the information logically, ensuring that each section flows naturally from one to the next. This helps in maintaining clarity. For example, list updates, fixes, and new features in separate sections or paragraphs, and use headings if necessary to guide the reader through the document.
Step 7: Proofread before publishing
Proofreading is a crucial step in the process of writing release notes, ensuring that the final document is clear, accurate, and free from errors. After crafting your release notes, it’s important to take the time to review them thoroughly before making them public. This step helps to identify and correct any mistakes or inconsistencies that could detract from the overall quality of the notes.
Start by reading through the entire document with a fresh perspective. If possible, set it aside for a short period before proofreading so you can approach it with a clear mind. This break helps you catch errors that you might overlook if you immediately review the notes after writing them. During this review, pay attention to both the content and the structure. Check for typographical errors, grammatical mistakes, and any awkward phrasing that might confuse the reader.
Next, verify the accuracy of the information presented. Ensure that all changes or updates mentioned in the release notes are correctly described and that there are no discrepancies between the notes and the actual release. Cross-check any references or links provided to make sure they are functional and lead to the correct resources. Consistency is key, so confirm that terminology and formatting are uniform throughout the document.
It’s also helpful to have someone else review the release notes. A second pair of eyes can often catch errors you might have missed and provide feedback on the clarity and comprehensibility of the content. This external review can be particularly valuable if the notes are intended for a diverse audience or if you’re working in a team where multiple contributors have added to the document.
Finally, consider the layout and design of the release notes. Ensure that the text is formatted in a way that is easy to read and that any visual elements, such as screenshots or diagrams, are clear and relevant. Proper formatting helps improve the readability of the release notes and ensures that the information is accessible to all users.
Key Benefits of Creating Your Release Notes Documentation on Bit.ai
To create release notes, you need a proficient tool that can make the process of documentation more efficient. This is where Bit.ai comes in!
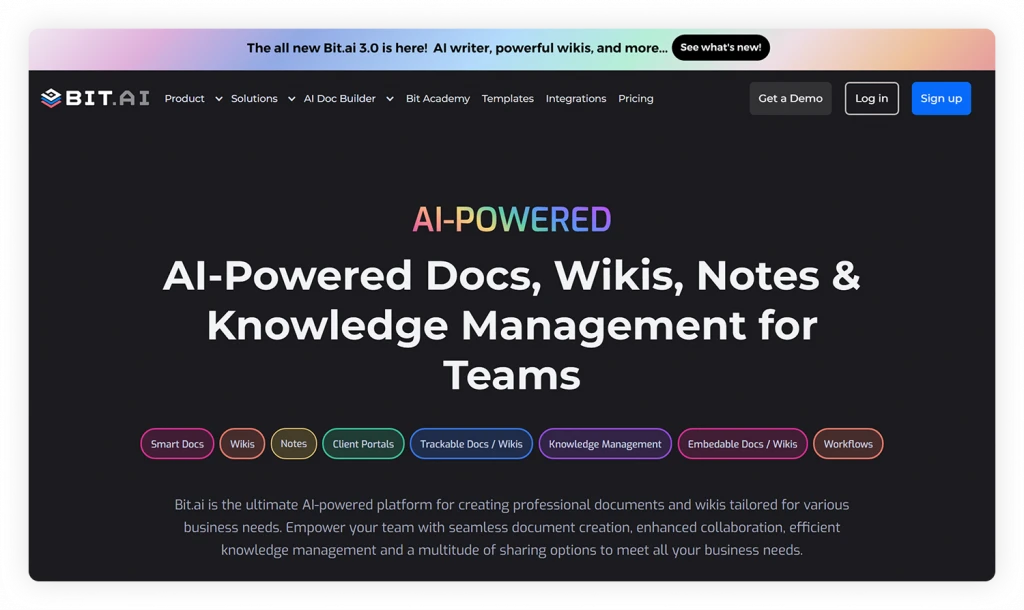
Bit serves as a central hub where collaborators, content, and knowledge can be accessed in one all-inclusive document. Technical writers can use Bit to create release notes, collaborate with their team in real-time, and store all assets in one place for easy and fast access.
This tool provides a common workplace for technical teams to collaborate, document, track and share their knowledge, brainstorm ideas, store digital assets, and innovate together. They can interlink release notes with other bit documents inside of their workspaces with Bit’s wiki feature for both- internal use and external sharing.
Various teams use Bit to create release notes documents, UX research plans, API documentation, roadmap, project charter, product requirements, pitch decks, business plans, SWOT analysis, competitive research, etc., they can easily add spreadsheets, Slideshares, Google Slides, YouTube videos, PDFs, maps, charts, graphs, and more to your documents and make them visually stunning.
Simple, Clean UI: Bit has a minimal design aesthetic to it, allowing a newbie to quickly get on board with the platform. Even though the platform is feature-rich, it does a great job of not overwhelming a new user and provides a systematic approach to work.
Organization of information: Organizational information is often scattered in cloud storage apps, emails, file formats, and more. Bit brings all your information to one place by allowing you to organize information in workspaces and folders. From documents to media files, Bit makes organizing data easier than ever.
Brand consistency: Focus on the content and let Bit help you with the design and formatting. Bit documents are completely responsive and look great on all devices. With amazing templates and themes, Bit docs provide you with the type of brand and design consistency that is unheard of in the documentation industry.
Smart search: Bit has very robust search functionality that allows anyone to search across workspaces, folders, document titles & content inside of documents, etc. quickly and easily across all of their workspaces. Users can search their digital assets using keywords, titles, descriptions, or tags. They can even search for files based on their source (example: YouTube).
Media Integrations: Companies use an average of 34 SaaS apps! It’s no wonder why most of our time is spent hopping from one app to the next, looking for information. This is why Bit.ai integrates with over 100+ popular applications (YouTube, Typeform, LucidChart, Spotify, Google Drive, etc.) to help teams weave information in their documents beyond just text and images.
Recommended power links and files you can add to your release notes template:
- Weblinks
- Google Sheets, OneDrive Excel, Airtable
- GitHub
- Social Media posts
- YouTube, Vimeo
- Draw.io, Lucidcharts
- Sketchfab, Figma, Marvel
- PDFs, PowerPoint in Google Drive/OneDrive
End-to-end sharing: Bit documents can be shared in a live state meaning that all changes that you make to the document will update in real-time. If you are sharing your documents with clients, they will always get your changes. You can even embed Bit documents on any website or blog.
Tons of other features: Bit has a plethora of amazing features like document tracking, Markdown editor support, cloud-upload, templates, and themes, document locking, document expiration, and much more, making it a well-rounded documentation tool.
Here are some of the main benefits of using Bit:
- Collaborate in real-time
- Interlink release notes and other documents
- Create fully responsive documents
- Create private release notes only visible to yourself or your team
- Track engagement on shared release notes with consultants, partners, etc
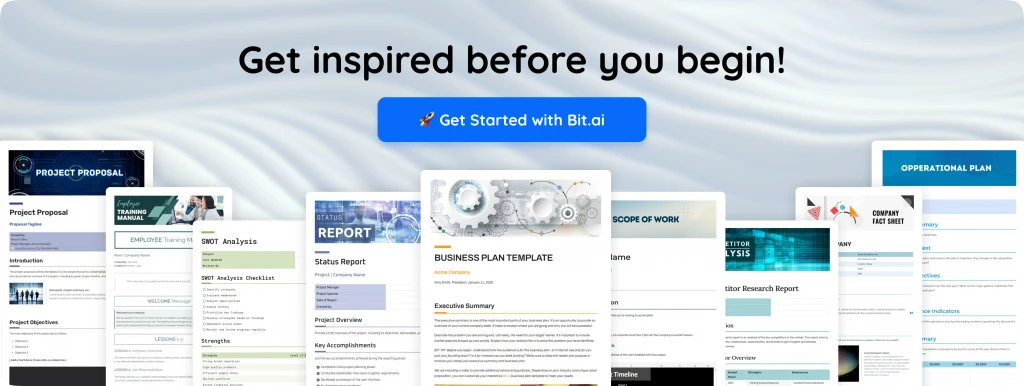
Release Notes Template
To make the process of creating your Release Notes Documentation easier, we have created a ready-made release notes template for you! Check it out below:
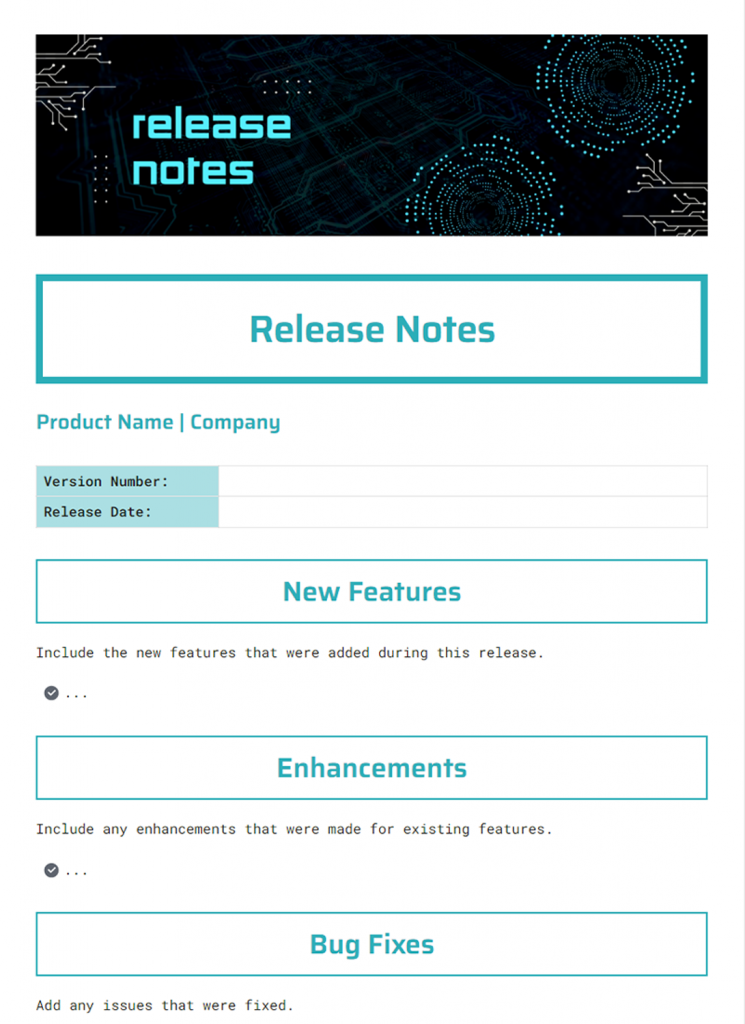
FREE TEMPLATE
The Release Notes Template Teams Actually Use
Includes release highlights, feature updates, fixes, known issues, & release dates.
✔ Ready-to-use format
✔ Keep every release organized
✔ Best for Product Managers, Developers & QA Teams
Takes under 1 minute • Trusted by teams at startups & enterprises
How to Use Bit’s Release Notes Template?
The process of creating a release notes document on Bit is insanely easy! Just follow these four simple steps to create your document quickly:
Step 1: Create a Bit Account
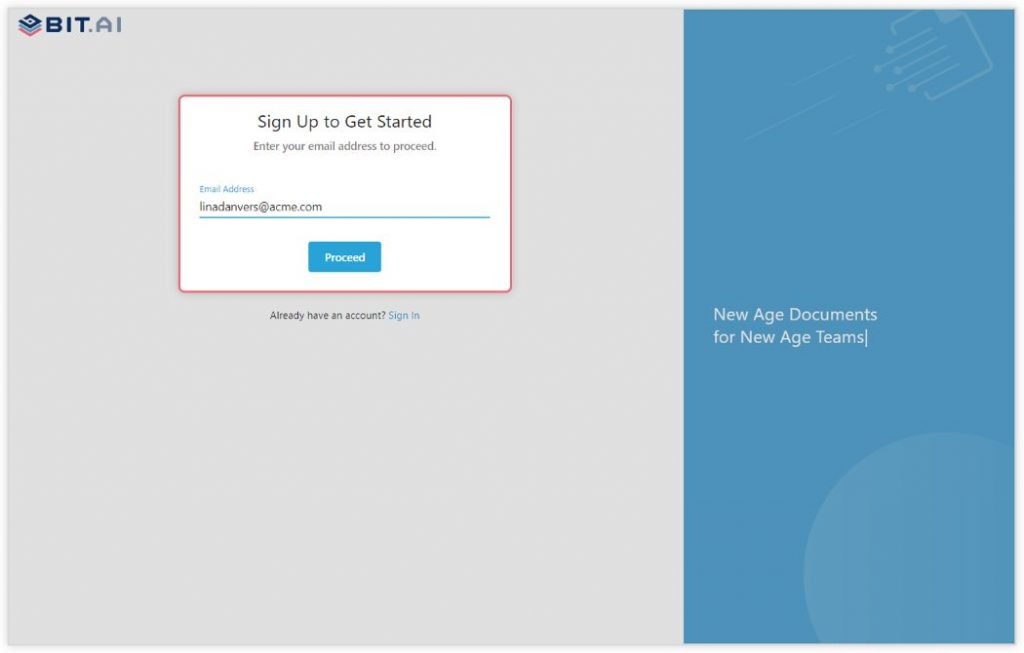
Go the home page of Bit.ai and click on Get Started for Free or Sign Up to get started. Enter your email address to sign up. Once in, you can create your personal profile.
Step 2: Create a Workspace
Workspaces are where the work gets done. Click on the ‘Create Workspace’ button on the right. A popup will show up prompting you to add a name for your new workspace.
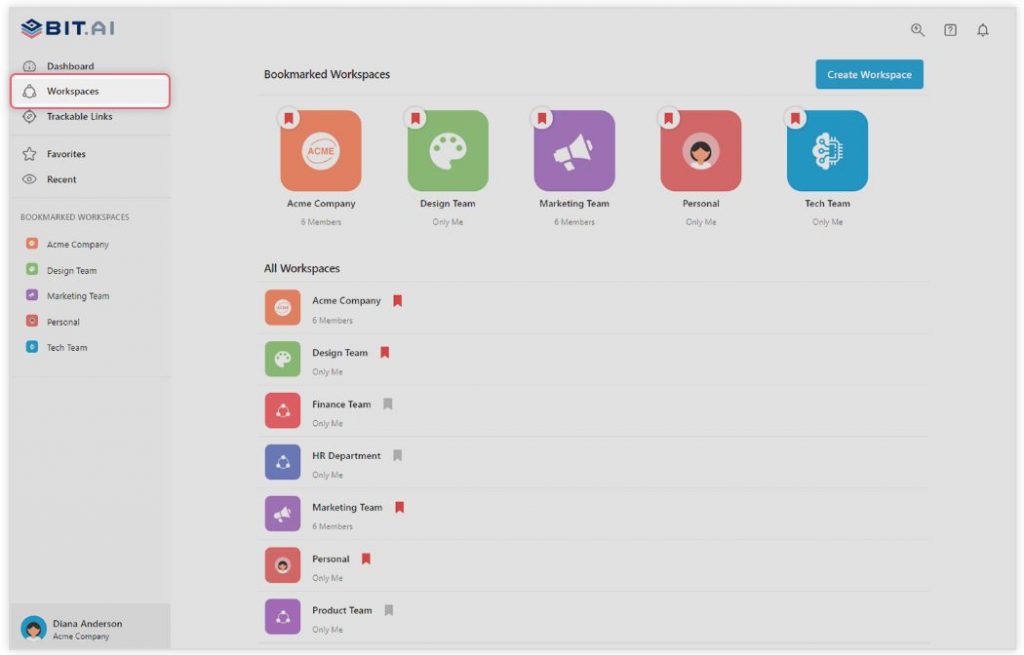
You can create a workspace around a team, department, large project, client, partner, etc. Inside each workspace, you can create an unlimited amount of Bit documents and access your content library (storage area for all of your digital assets – web links, files, cloud files, rich embeds, etc.).
Step 3: Add Team Members
Bit allows your team members to collaborate in real-time and get work done. Collaboration starts at the workspace level.
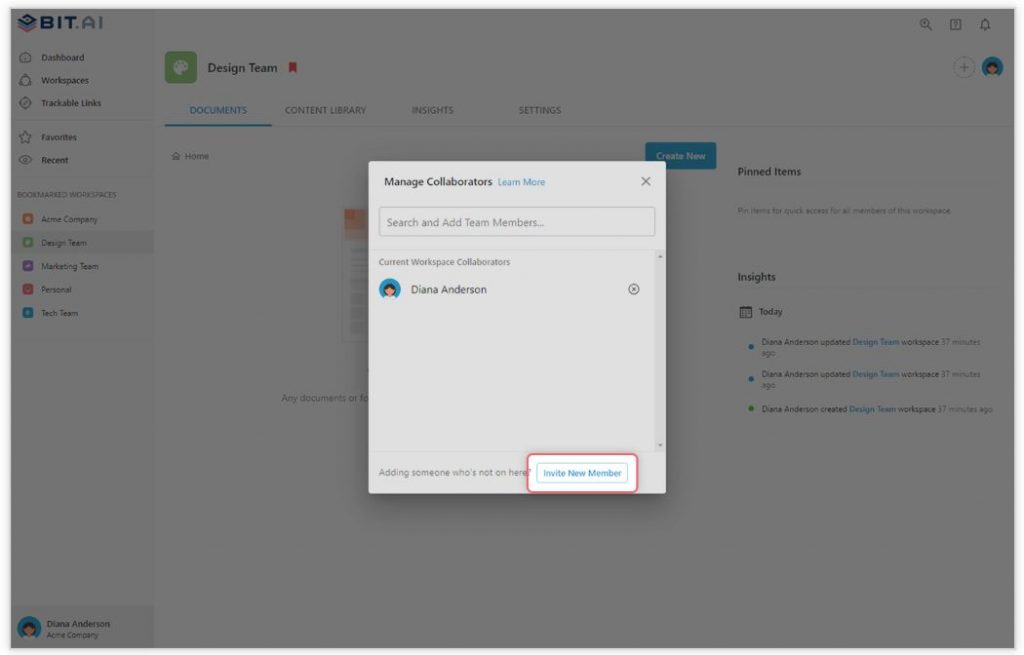
You create private workspaces by default. However, you can invite others to join you inside of a workspace and collaborate together with the knowledge, projects, documents, and content inside of the workspace.
Step 4: Create Your Desired Document
Once you are in the workspace, click on the ‘Create New’ button. Select ‘From Template’ in the dropdown. A pop-up will display allowing you to select a template from the gallery.
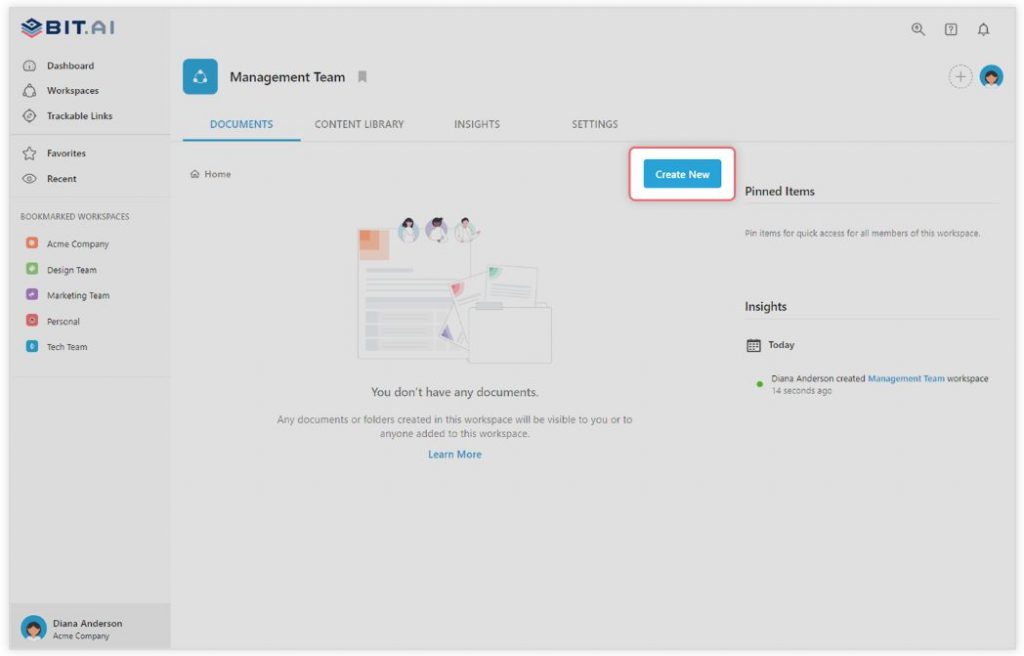
In the search box on the top left corner, you can search for the “release notes template”. Once your desired template pops up, click on it and click on the “Use Template” button on the bottom right corner.
That’s it! Your release notes document is ready for use!
Our team at bit.ai has created a few more templates to make your processes more efficient. Make sure to check them out before you go, your team might need them!
- Status Report Template
- API Documentation
- Product Requirements Document Template
- Software Requirements Document Template
- UX Research Template
- Issue Tracker Template
- Statement of Work
- Scope of Work Template
Make a Big Impact with Great Release Notes
Your tech teams work day and night to improve your product, add new features, fix bugs, and provide value to your customers, so you can’t let their efforts and important updates go unnoticed.
Using release notes effectively helps you to not only announce the new feature out into the world, but also build excitement around your entire product, re-engage users, and extend the brand’s reach to larger audiences.
If you need any help with our release notes template or want to know how Bit can help your business, let us know by tweeting us @bit_docs. Cheers!
FAQs
- Who should write release notes in a product team?
Release notes can be written by several people depending on your team. Product managers, technical writers, QA engineers, or developer leads often draft them. The best release notes usually come from a collaborative effort where technical accuracy meets user-friendly language. - How technical should release notes be?
Keep them user-focused. Unless the notes are specifically for developers or integrators, avoid heavy technical jargon. Describe the changes, why they matter, and how users benefit from them. If technical details are needed, place them in a separate section or link to developer documentation. - Should release notes include minor bug fixes?
Yes, but organize them clearly. Group fixes under a “Bug Fixes” section so users who only care about major updates can skip ahead. Short, clear bullet points work best for listing these items. - How do I decide the tone for release notes?
Match the tone to your audience and brand. For consumer apps, a friendly and concise tone works well. For enterprise or developer products, you can be more formal and detailed. Above all, aim to be clear, direct, and helpful. - Where should I publish release notes for maximum impact?
Use multiple channels. Publish them in-app or on a product updates page for easy access, email them to power users, and share highlights on social media or your blog. Add links to more detailed documentation for users who want deeper information.
Keep reading & learning: