We all know that building a great product requires tons of research and extensive planning. Without having a strong foundation of what needs to be done and by whom, you are likely to create a product development mess.
A product requirements document (PRD) is a product manager’s best friend as it provides a guiding hand to the entire team in making their product a success. However, creating a product requirements document can be a bit intimidating.
Doing the research, collaborating with teammates, and storing and sharing assets can quickly result in chaos. This is why smart product managers often use a product requirements document template to simplify their workflow.
Before we introduce you to our awesome product requirements document template, let’s take a quick look at what exactly is a product requirements document and what are the things one needs to include in these documents.
What is a Product Requirements Document? (Definition)
A product requirements document describes the product you are about to build in detail. It outlines the purpose of building the product, its intended use case(s), features, functionalities, and the timeline of building the product. All in all, it describes an overall vision of what the team is about to build.
Before you start working on a product, there’s a heck of a lot of research that goes into defining its structure, features, requirements, roadblocks, and more. A key area where most product managers start with their product development is a product requirements document.
Why are Product Requirements Documents Important?
We all know how difficult it could get traveling around a new city or country without a travel guide or a map. Similarly, in product development, it is highly improbable you’ll create the right product without proper documentation of product requirements.
Such documents are created before the product has started development in order to get every stakeholder on the same page regarding its functionality.
A product requirements document ensures that the product development team and other stakeholders (clients, partners, etc.) are on the same page about what needs to be built and are completely aware of the use case, goal, scope, features, functional requirements, challenges, and budget regarding the product.
A product requirement document provides a roadmap for the entire product team and acts as a guide they can refer to whenever they get stuck during the product development.
How to Create a Product Requirements Document? Follow these Steps!
A typical product requirements document should involve the following details:
Step 1. Target Release Date
The tentative release date for the product should be determined based on a variety of factors like your progress to date, resource levels if there have been adequate levels of testing, and the nature of competition.
You should never rush into releasing if your product is not at a 100% level, as this can turn users away. However, don’t keep delaying the release as it gives competitors an opportunity to acquire more customers before you.
Read more: Release Notes: What are they & How to Write them? (Free Template Included)
Step 2. Add Vision for your Product
The vision is essentially your North Star that describes in detail where you want your product to be in the future. It allows you to see beyond what’s already in front of you and envision a long-term plan.
Step 3. Set Goals
List product goals including their time frame, and success metrics. These should be high-level milestones that help add up to the vision and long-term strategy.
Step 4. Mention the Objective of your Product
Give the context of how this project fits into the organization’s strategic goals. These objectives are more detailed versions of strategic goals that help the company break the bigger picture into smaller portions.
Step 5. Initiatives
To achieve your goals and objectives, strategic actions need to be taken which involve investing resources. These are the initiatives that are carried out with specific scopes, budgets, and set dates for completion.
Initiatives are very important as this is the stage where thought becomes action. It is essential to associate every initiative with an objective so that there is a clear understanding as to why the initiative is being carried out.
Step 6. Include Persona(s)
Describe the intended target audience for who the product is for. Make sure you sub-define them within categories that appeal to different pain points/needs.
Each type of customer will have different interests, purchase intentions, personalities, and general demographics. Personas should be created based on information like data, surveys, and engagements.
Step 7. Dependencies/Assumptions
With every project, there are some assumptions that are carried out. These dependencies can be based around the business, technical aspects, or the customer. It is important to note these down as they make a significant impact on the decisions taken by you.
Step 8. Features
Include the features added- these should be in-depth and focus on the benefits that they offer to the customer. What do they cater to that other companies don’t? How do the features solve the pain points of the customer?
The description of features should also be technical but should focus more on why it makes the customer’s life easier.
Step 9. User Flow and Design
Insert wire-frames and mock-ups that depict the customer experience. Describe the path that a user will take on your app or website to carry out a particular task.
Analyze the reason behind design themes and the interface; why are things placed the way they are? What do you want the customer to do? Make a flow map that elaborates on the user’s entry, potential points of exit, and the actions they take along the way.
Step 10. Analytics
Describe the Key Performance Indicators (KPIs) to study that will help analyze the efficiency of the product.
These should be quantifiable measurements that help the business understand the company’s performance in terms of strategic, financial, marketing, and operational activities.
Examples of KPIs include customer lifetime value, monthly sales growth, lead-to-sale conversion rate, and more.
Read more: Product Planning: What is it & How to do it? (Process & Steps)
Key Benefits of Creating Your Product Requirements Document on Bit.ai
For creating product requirements documents, you need a proficient tool that can help you create, share, and collaborate with stakeholders and get work done efficiently. This is where Bit.ai comes in!
Bit.ai is a new-age documentation and knowledge management tool that helps teams to collaborate, share, track, and manage all company knowledge in one place. Bit documents, unlike your standard Word docs, are interactive. This means product managers can easily add spreadsheets, videos, PDFs, cloud files, and more to a document with a single click!
Whether your team is creating product requirements documentation, technical specs sheet, training manuals, best practices, client support material, product launch marketing documents, pitch decks, business plan, SWOT analysis, competitive research, project management plan, etc, they can easily add spreadsheets, Slideshares, Google Slides, YouTube videos, PDFs, maps, charts, graphs, and more to your documents and make them visually stunning.
Simple, Clean UI: Bit has a very minimal design aesthetic to it, allowing a newbie to quickly get on board with the platform. Even though the platform is feature-rich, it does a great job to not overwhelm a new user and provides a systematic approach to work.
Organization of information: Organizational information is often scattered in cloud storage apps, emails, Slack channels, and more. Bit brings all your information in one place by allowing you to organize information in Workspaces and folders. Bring all your documents, media files, and other important company data in one place.
Brand consistency: Focus on the content and let Bit help you with the design and formatting. Bit documents are completely responsive and look great on all devices. With amazing templates and themes, Bit docs provide you with the type of brand and design consistency that is unheard of in the documentation industry
Smart search: Bit has very robust search functionality that allows anyone to search and find any files, images, documents, etc quickly and easily across all of their workspaces. Users can search their digital assets using keywords, titles, descriptions, or tags. They can even search for files based on their source. (i.e., YouTube).
Media Integrations: Companies use an average of 34 SaaS apps! No wonder why most of our time is spent hopping from one app to the next, looking for information. This is why Bit.ai integrates with over 100+ popular applications (YouTube, Typeform, LucidChart, Spotify, Google Drive, etc) to help teams weave information in their documents beyond just text and images.
Recommended power links and files you can add to your product requirements document:
- Weblinks
- GitHub
- PDFs, PowerPoint in Google Drive/OneDrive
- Google Sheets, OneDrive Excel, Airtable
- YouTube, Vimeo
- Social Media posts
- Draw.io & Lucidcharts
- InVision, Framer, Figma
Sharing: Bit documents can be shared in a live state meaning that all changes that you make to the document will update in real-time. If you are sharing your documents with clients, they will always get your most up-to-date changes. You can even embed Bit documents on any website or blog.
Tons of other features: Bit has a plethora of amazing features like document tracking, cloud-upload, templates and themes, document locking, document expiration, and much more, making it a well-rounded documentation tool.
Bit provides a common workplace for project members to collaborate, document, share their knowledge, assign tasks, monitor timelines, brainstorm ideas, store digital assets, and innovate together. The best part is that this knowledge is safely secured in your workspaces and can be shared (or kept private) with anyone in your organization or the public!
Here are some of the main benefits of using Bit:
- Collaborate in real-time.
- Interlink your product requirements document and other documents.
- Create fully responsive documents.
- Create product requirements documents that are only visible to yourself or your colleagues.
- Track engagement on shared product requirements documents with customers, partners, etc.
- Embed your product requirements documents onto any website.
Read more: Software Requirements Document: Definition, Steps, and Template Included!
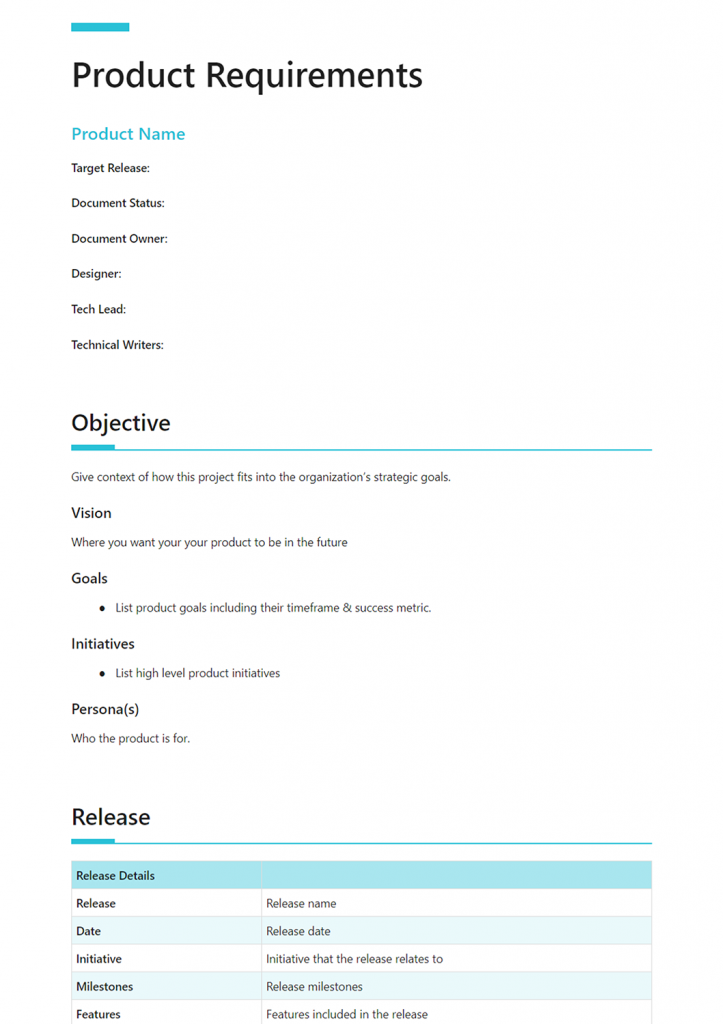
Product Requirements Documentation Template
To make the process of creating your product requirements document easier, we have created a ready-made product requirements document template for you! Check it out below:

How to Use Bit’s Product Requirements Documentation Template?
The process of creating product requirements document on Bit is insanely easy! Just follow these four simple steps to create your document quickly:
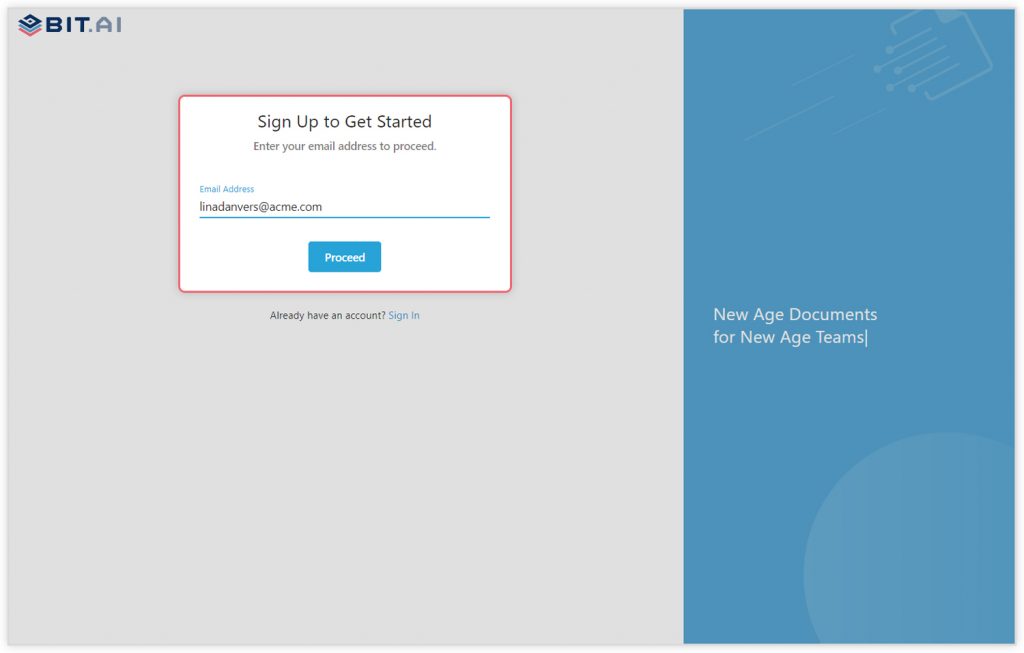
Step 1: Create a Bit Account
Go the home page of Bit.ai and click on Get Started for Free or Sign Up to get started. Enter your email address to sign up. Once in, you can create your personal profile.
Step 2: Create a Workspace
Workspaces are where the work gets done. Click on the ‘Create Workspace’ button on the right. A popup will show up prompting you to add a name for your new workspace.
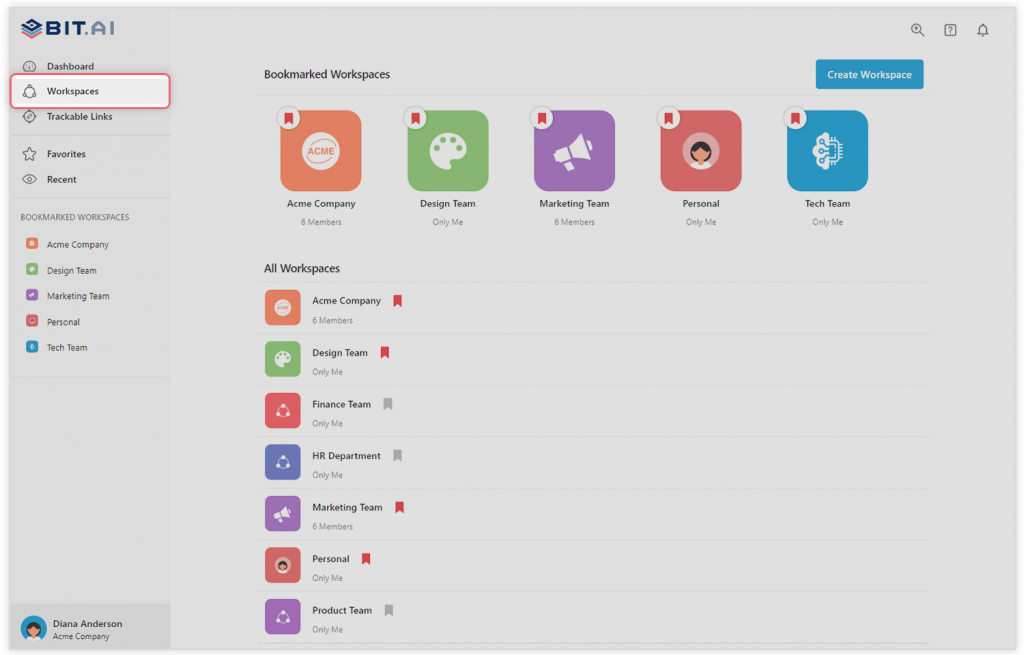
You can create a workspace around a team, department, large project, client, partner, etc. Inside each workspace, you can create an unlimited amount of Bit documents and access your content library (storage area for all of your digital assets – web links, files, cloud files, rich embeds, etc.).
Step 3: Add Team Members
Bit allows your team members to collaborate in real-time and get work done. Collaboration starts at the workspace level.
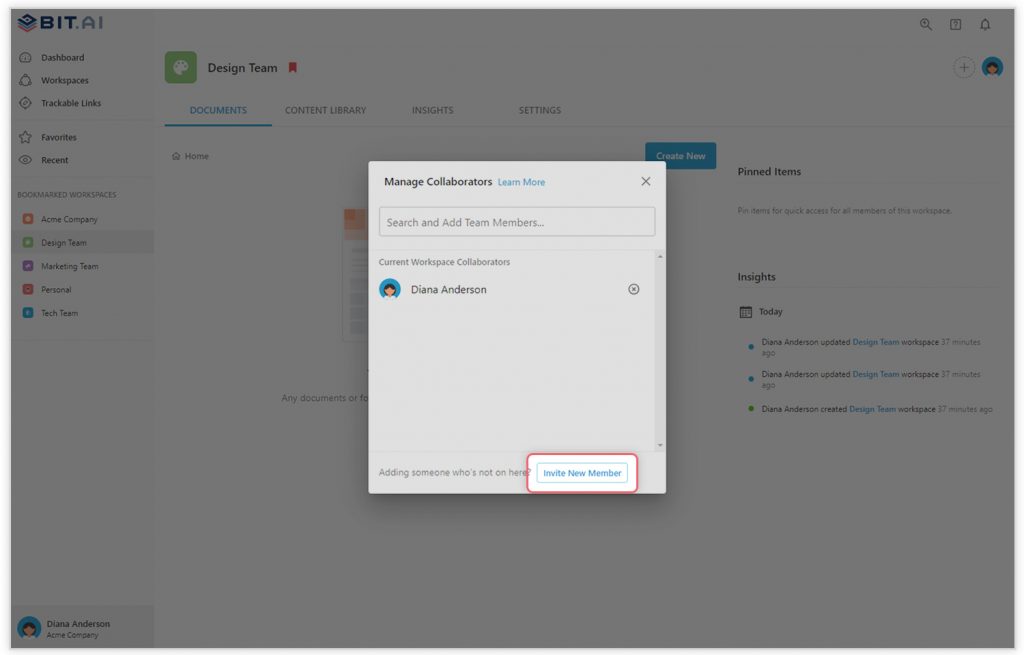
You create private workspaces by default. However, you can invite others to join you inside of a workspace and collaborate together with the knowledge, projects, documents, and content inside of the workspace.
Read more: Business Requirements Document (BRD): Definition, Format & How to Create!
Step 4: Create Your Desired Document
Once you are in the workspace, click on the ‘Create New’ button. Select ‘From Template’ in the dropdown. A pop up will display allowing you to select a template from the gallery.
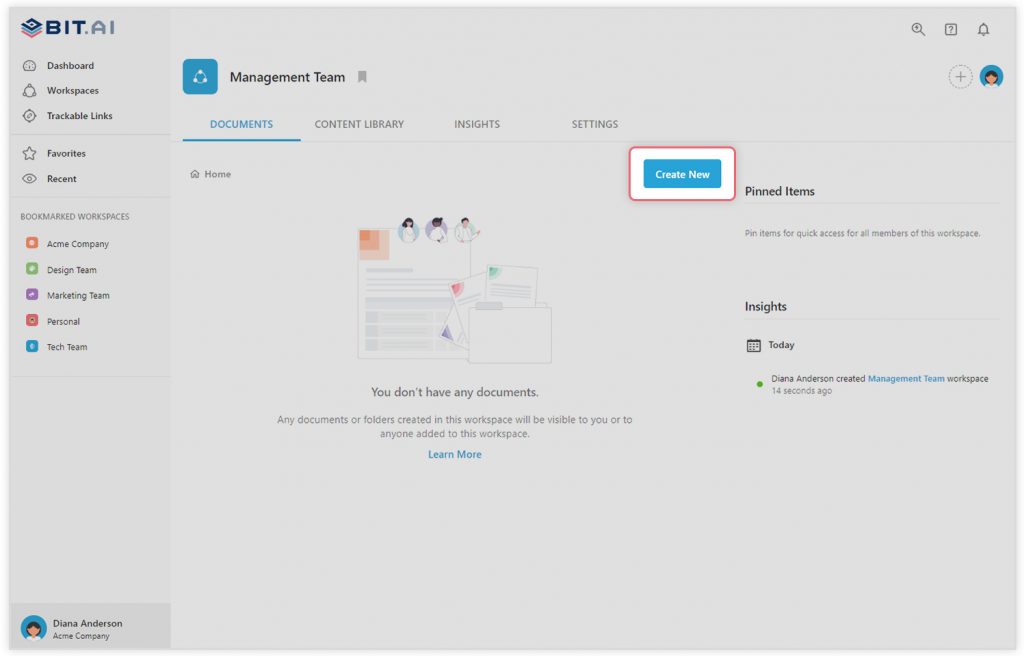
In the search box on the top left corner, you can search for the “product requirements template”. Once your desired template pops up, click on it and click on the “Use Template” button on the bottom right corner.
That’s it! Your product requirements document is ready for use!
?Watch this video to learn more?
Over to You!
The product requirements document is core to building a great product and serves as a living document for any product developer, or any other stakeholder to follow the purpose and status of the product.
A documentation tool like Bit can help product managers significantly reduce the time and effort required to create such documents and bring all the resources pertaining to a project under a single roof.
This, in turn, helps developers, engineers, designers, marketers, and other team members to collaborate and work efficiently, making sure nothing slips through the cracks. If you need any help with the product requirements document template or want to know how Bit can help your business, let us know by tweeting us @bit_docs. Cheers!
Further reads:
- Product Mix: Definition, Dimensions, Importance & Examples!
- Market Requirements Document (MRD): What, Why, and How?
- Procurement Management Plan: What, Why, and How to Create?
- Product-Market Fit: What is it & How to Achieve it?
- Requirements Gathering: What is it & How Does it Work? (Complete Process)
- Product Development Process: Definition & Key Stages!