“Vision without action is a dream. Action without vision is simply passing the time. Action with vision is making a positive difference.” ~ Joel Barker
Expressed in the terms of a project manager, this quote simply means that for any dream project, you are going to need a clear vision and a plan to keep your team and client abreast of everything that is going on.
One powerful way to do this is to create and use a dynamic status report!
A status report is like a magical window for project managers to keep their stakeholders engaged and enable them to track overall progress. It is also a reflection of team dynamics and helps the team progress towards their individual, team, or organizational goals.
 However, creating a status report can be a little stressful, especially, when you have a diverse team and multiple sub-projects. This is why we built a status report template to help you align all levels of communication and ensure there are no roadblocks.
Before we dig into the template, it is important to understand what exactly is a status report, why is it important, and what are things you need to include in this document.
Let’s begin!
What is a Status Report? (Definition)
Status reports are regular updates sent to management and teams to understand the status of projects, any issues, and milestones achieved. By keeping everyone in the loop with updates on a weekly, monthly, or quarterly basis you help provide accountability and align resources when necessary.
Why is Status Report Important?
When there are complex deliverables and many moving parts across various collaborators it’s important to have checkpoints. That’s where we use status reports! These documents help the team to see what’s going well and what isn’t. It also helps managers see the overall success or failure of projects.
 A well-defined status report also helps in:
- Streamlining communication efforts across stakeholders and organizations.
- Making it easier to disseminate and gather information about key elements of the project.
- Ensuring that project managers have all the necessary information for decision-making and execution.
- Amplifying key goals and messages around the project.
- Keeping a record of past events, actions, and decisions.
Read more: How to Write Project Reports that ‘Wow’ Your Clients
How to Create a Status Report? Follow these Steps!
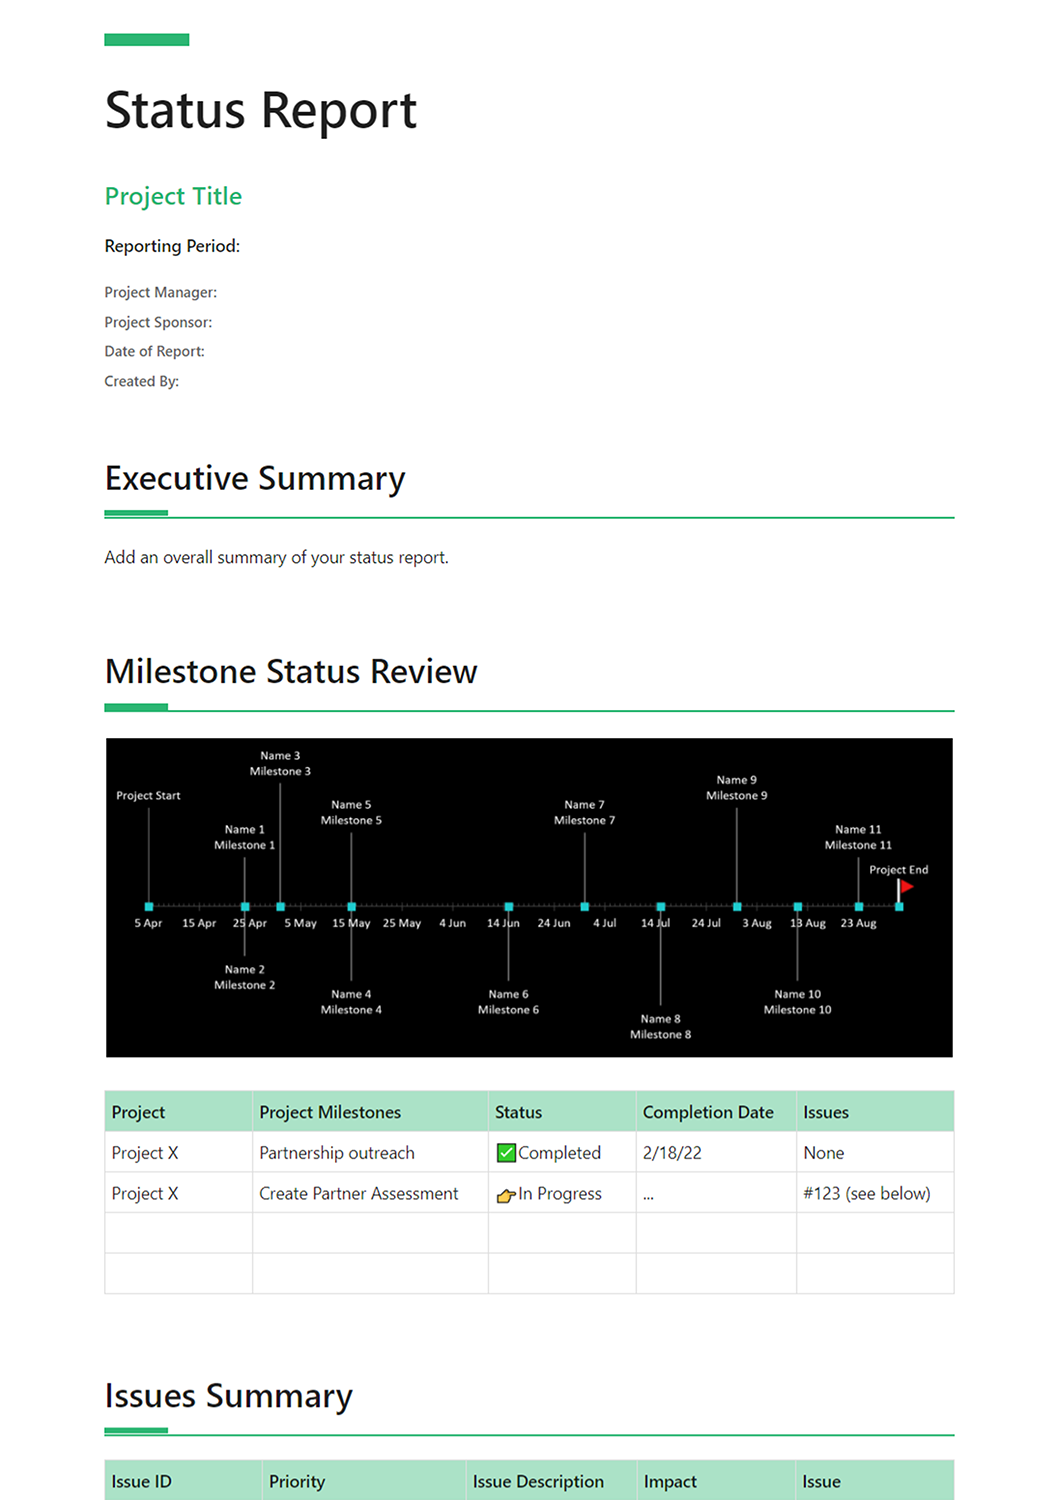
Step 1. Title
Start with the name of the project whose status is being tracked. Name it so that it is easily identifiable.
Step 2. Reporting Period
Determine the frequency to which the status report will be updated. It is important to maintain discipline in sticking to this frequency so that there is a continuous check on the project’s progress and to ensure no delays.
Step 3. Project Manager
Write down the name of the project manager so that the whole team knows who to ask if any doubts arise.
Step 4. Project Sponsor
Note the name of the client whose project is being worked on. Attach some of their details so that the team has a reference of the client’s general information and requirements.
Step 5. Date of Report
Note down the date that the report was created for future reference. When updating the report, create a column that highlights the new additions and the dates they were made. This will allow the team to understand how the progression of the report occurred.
Step 6. Report Creator
Write down the name of the person who created the report. This may be someone from the team, or the project manager himself. This is just to identify who started creating the status report and who kickstarted the documentation process.
Step 7. Executive Summary
Give a description of the nature of the project that lets the team understand the overview of what is to be carried out. This summary will contain short statements that outline the problem faced by the client, the proposal in hand, and any other background information that can be useful to the team working on the project.
Step 8. Milestone Status Review
- Project: Describe in detail the project that is being undertaken. What are the problems at hand and what are the exact steps being taken to solve it?
- Project Milestones: Set milestones for the project that can easily be tracked. The SMART theory should be applied to the milestone setting as well, making them specific, measurable, achievable, realistic, and time-bound.
- Status: What is the status of the project? You can use a rating system to establish the percentage of work done, or have different categories under where the project lies, such as “not started”, the phase of “in-progress”, “under review by the client”, or “completed”.
- Completion Date: Note down the completion dates of the various milestones.
- Issues: What were the issues that were tackled in the milestone?
Step 9. Issues Summary
- Issue ID: Each issue or problem that is fixed should have a unique AlphaNumeric ID so that it is easy to track in the future, and to refer to it if similar problems arise later on.
- Priority: How important is it to solve this issue relative to the other issues? Is it one of the main hurdles or a secondary issue that can be handled at a later point in time?
- Issue Description: What is the issue all about? What are technical faults that are causing it?
- Impact: What problems is the issue causing and why does it need to be addressed immediately? How severe is the impact of the issue? Is it causing a small bug in the user interface or totally hampering the ability of the user to use the software?
Read more: Annual Report: What is it & How to Create it?
Tips to Keep in Mind While Writing Your Status Report:
You can follow these tips to prepare your status report:
- Create an outline of your project. Using the outline make a structure for your status report.
- Know your audience. Who are you addressing, what are their expectations, and what information do you want to provide them?
- Organize your thoughts and ideas for clear communication and a concise summary.
- Focus on both details and the final result. Your reader might need to know each step and where the steps lead.
- Keep your report crisp. Unless you have in-depth specifications of what should be in your status report, try to keep it under 2 pages.
Key Benefits of Creating Your Status Report on Bit.ai
Bit is a modern-day workplace collaboration tool that empowers teams to make communicate while collaborating in a common workplace. The design and marketing team can create, customize, collaborate and share release notes, roadmaps, blog posts, sales playbooks, manuals, presentations, email templates, and other internal as well as client-facing material.
Whether your team is creating status reports, operational plans, process documentation, training manuals, best practices, client support material, etc. they can easily add videos, interactive charts, Google forms, PDFs, SlideShare decks, spreadsheets, social media content, and more directly into a Bit document. It’s a smart way to add context to the content you are sharing.
 Simple, Clean UI: Bit has a very minimal design aesthetic to it, allowing a newbie to quickly get on board with the platform. Even though the platform is feature-rich, it does a great job as to not overwhelm users and provides a systematic approach to work.
Organization of information: Organizational information is often scattered in cloud storage apps, emails, Slack channels, and more. Bit brings all your information in one place by allowing you to organize information in workspaces and folders.
Brand consistency: Focus on the content and let Bit help you with the design and formatting. Bit documents are completely responsive and look great on all devices. With amazing templates and themes, Bit docs provide you with the type of brand and design consistency that is unheard of in the documentation industry
Smart search: Bit has very robust search functionality that allows anyone to search and find any files, images, documents, etc. quickly and easily across all of their workspaces. Users can search their digital assets using keywords, titles, descriptions, or tags. They can even search for files based on their source (for example YouTube).
Media Integrations: Companies use an average of 34 SaaS apps! It’s no wonder why most of our time is spent hopping from one app to the next, looking for information. This is why Bit.ai integrates with over 100+ popular applications (YouTube, Typeform, LucidChart, Spotify, Google Drive, etc.) to help teams weave information in their documents beyond just text and images.
Sharing: Bit documents can be shared in a live state meaning that all changes that you make to the document will update in real-time. If you are sharing your documents with clients, they will always get your most up-to-date changes. You can even embed Bit documents on any website or blog.
Tons of other features: Bit has a plethora of amazing features like document tracking, document locking, password protection, etc. to keep your work documents safe and secure.
Bit provides a common workplace for teams to collaborate, document, share their knowledge, brainstorm ideas, store digital assets, and innovate together. The best part is that this knowledge is safely secured in your workspaces and can be shared (or kept private) with anyone in your organization or the public!
Status Report Template
To make the process of creating your status report documentation easier, we have created a ready-made status report template for you! Check it out below:
How to Use Bit’s Status Report Template?
The process of creating a status report document on Bit is insanely easy! Just follow these four simple steps to create your document quickly:
Step 1: Create a Bit Account
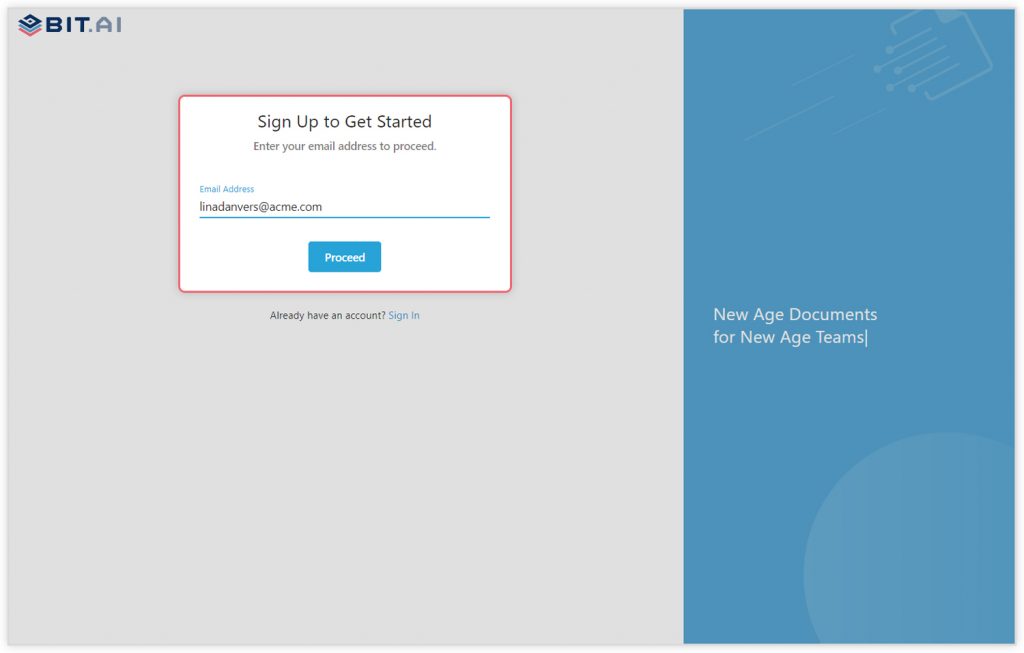
Go the home page of Bit.ai and click on Get Started for Free or Sign Up to get started. Enter your email address to sign up. Once in, you can create your personal profile.
Step 2: Create a Workspace
Workspaces are where the work gets done. Click on the ‘Create Workspace’ button on the right. A popup will show up prompting you to add a name for your new workspace.
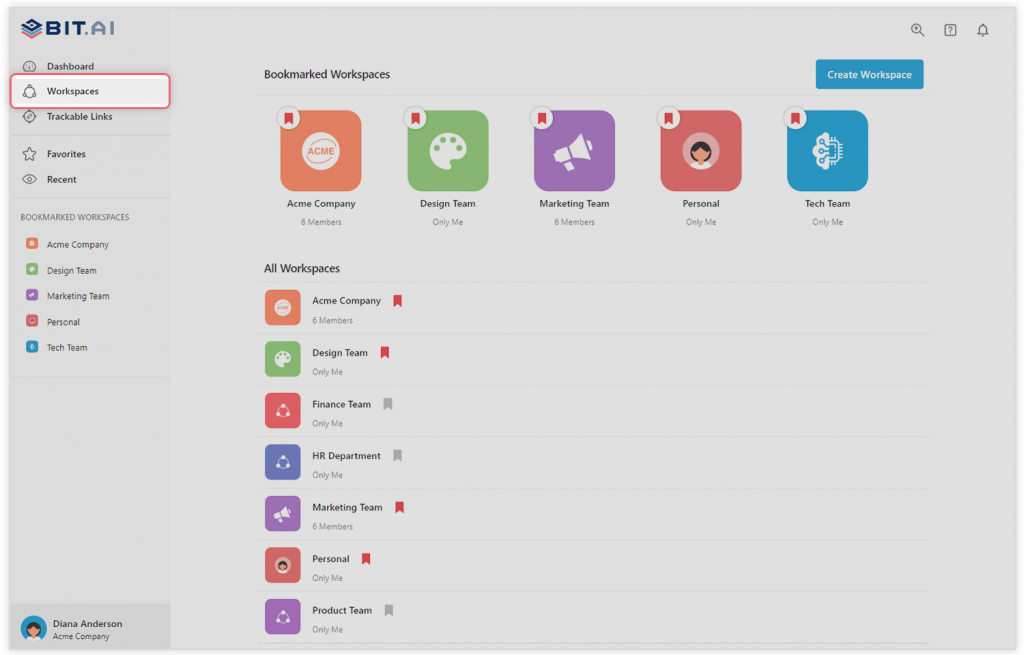
You can create a workspace around a team, department, large project, client, partner, etc. Inside each workspace, you can create an unlimited amount of Bit documents and access your content library (storage area for all of your digital assets – web links, files, cloud files, rich embeds, etc.).
Step 3: Add Team Members
Bit allows your team members to collaborate in real-time and get work done. Collaboration starts at the workspace level.
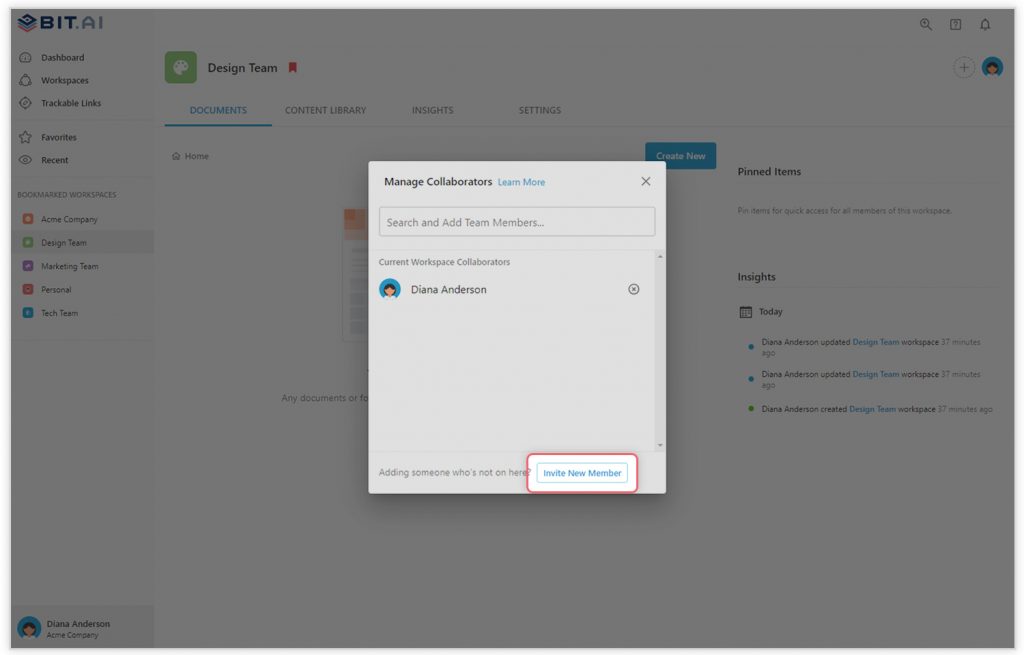
You create private workspaces by default. However, you can invite others to join you inside of a workspace and collaborate together with the knowledge, projects, documents, and content inside of the workspace.
Step 4: Create Your Desired Document
Once you are in the workspace, click on the ‘Create New’ button. Select ‘From Template’ in the dropdown. A pop up will display allowing you to select a template from the gallery.
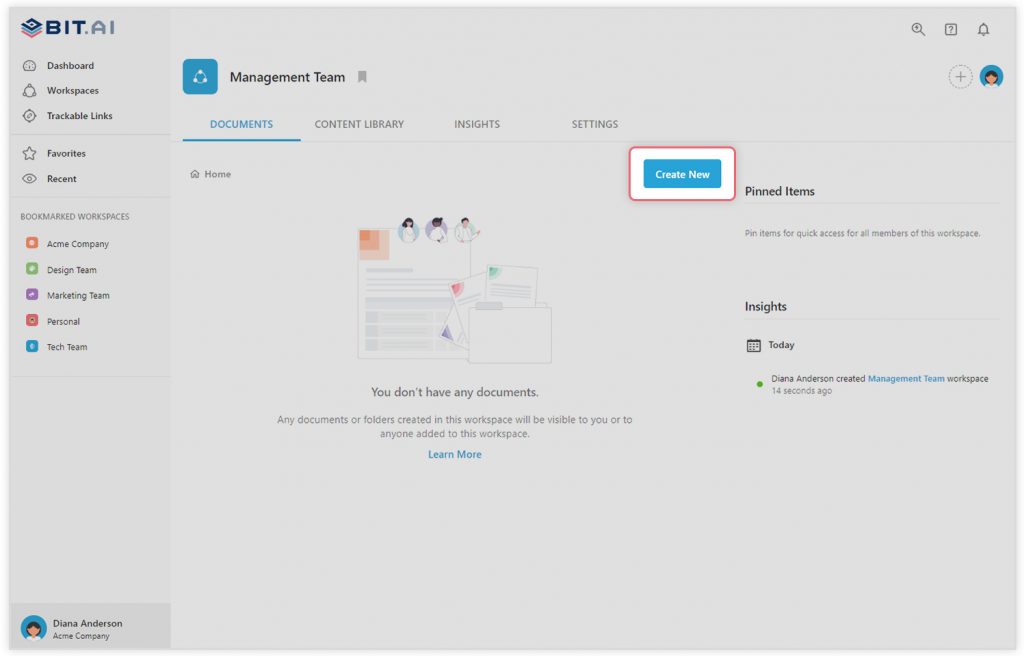
In the search box on the top left corner, you can search for the “status report template”. Once your desired template pops up, click on it and click on the “Use Template” button on the bottom right corner.
That’s it! Your status report document is ready for use!
Wrapping Up!
A well-defined project status report is one of the most important tools for better communication and to inform all stakeholders where the project stands. This status report template by Bit will not only make the process of reporting much easier but will save things from slipping through cracks!
Tell us about your reporting practices and how you executed them, in the comments section below or tweet us @bit_docs!
Further reads:
- Technical Report: What is it & How to Write it? (Steps & Structure Included)
- Formal Reports: What are they & How to Create them!
- How To Create a Performance Improvement Plan?
- Business Report: What is it & How to Write it? (Steps & Format)
- How To Write A Business Proposal?
- How to Create a Clear Transition Plan for your Business?
Related posts
About Bit.ai
Bit.ai is the essential next-gen workplace and document collaboration platform. that helps teams share knowledge by connecting any type of digital content. With this intuitive, cloud-based solution, anyone can work visually and collaborate in real-time while creating internal notes, team projects, knowledge bases, client-facing content, and more.
The smartest online Google Docs and Word alternative, Bit.ai is used in over 100 countries by professionals everywhere, from IT teams creating internal documentation and knowledge bases, to sales and marketing teams sharing client materials and client portals.
👉👉Click Here to Check out Bit.ai.


