Create a wiki and experience the power of remote collaboration.
We have all heard of Wikipedia, people’s go-to page when they want to learn about something new or read an unfamiliar topic. Wikipedia’s mission is to create a comprehensive resource of knowledge and is created using wikis. ‘Wikis’ can be used in a variety of ways and are quickly becoming the sought technology for knowledge management and remote collaboration.
Organizations need to gather knowledge, organize information from multiple sources, share experiences, and provide insights to enable their employees to do their job effectively.
According to McKinsey & Company, a searchable internal knowledge base can boost employee productivity by 35%. One way that companies accomplish creating this knowledge base is by using wikis – pages that organize information and can be shared with multiple users.
Whether you want to store your company work or manage personal information, this article will introduce you to what is a wiki, the advantages, and disadvantages of it. We also explain how to create a wiki, and how to start using it effectively at your company.
What Is a Wiki? (Definition)
The name “Wiki” was given by the creator of the first wiki Ward Cunningham. It is a shortened form of the Hawaiian word “wiki- wiki”, which means quick.
A wiki is a web page that can be edited by multiple users using a simple web browser and an internet connection. Wikis are a quick and easy way to create information repositories, search information, and work collaboratively on the same page.
Wikipedia defines wikis as “A text publication collaboratively edited and managed by its own audience directly using a web browser.” This means wikis can be created and edited by anyone with access to the web page.
A typical wiki can contain multiple pages on a topic and serves a knowledge hub for multiple contributors.
Different Types of Wikis
We can divide the various types of wikis based on the purpose of creation and the extent of the collaboration sought. Is your intent to create a knowledge hub for the world to access or a personal directory for you to search your files? Do you want to limit the people who can add or edit content? Let’s discuss the 3 main types of wikis:
1. Public Wikis
Wikis created to serve as an information hub where anyone can create and edit content are called public wikis. They are open to collaboration with all. Popular wikis such as Wikipedia, Scholarpedia, WikiTravel, are publicly accessible.
2. Private Wikis
Private wikis are used by companies as an internal knowledge base, to manage their in-house information, enabling teams to easily share knowledge and work together. It’s a place where your team can store documents about company policies, processes, guidelines, SOPs (Standard Operating Procedures), projects, product lists, workflows, shared logins, checklists, etc.
Think of it as your in-house Wikipedia made in private for your company. We shall go over private wikis in detail in this article.
3. Personal Wiki
You can also use wikis as a personal wiki to take down notes, as a knowledge base, diary, writer’s tool, or even project management.
Advantages of Using Wikis
At the onset, a wiki can be an efficient way to gather and distribute information. It can improve remote collaboration among team members and provide an easy way to have a team on the same page. Some of the key advantages of wikis are as follows:
- Anyone can create a wiki
- Easy for anyone to edit a wiki
- Simple to learn and use
- Easy to update information
- Teams can work on a single web page together
- Share and collaborate on documents easily
- Can track changes made and revert to the previous version
- Flexible structure to create a wiki as per your needs
- Wide range of wiki software to choose from
- Low cost to manage

We shall go over in detail about private wikis, often called internal wikis or company wikis. A private wiki, or internal wiki, functions as a central information hub to manage and share all company knowledge and information.
Read more: What’s the Best Way to Create an Internal Wiki
Do You Need a Private Wiki?
Before starting on wiki software, it’s important to identify the purpose of creating your wiki. What are the benefits of creating a wiki and sharing knowledge in this way?
Make a list of the different departments, people, information resources required, and the need for people to collaborate.
Let’s look at the key reasons why your company could need a private wiki:
- Do you have a remote team that needs to collaborate?
- Do you want to create a knowledge hub for all employees?
- Are you looking for a simple yet powerful way to create and edits documents together?
- Do you wish to facilitate communication and discussion around documents?
- Does your team need to quickly search and access information?
- Do you need a quick way to import and export internal or external information?
- Do you want to see all the writing and editing steps in a document?
- Are you looking for a quick way to onboard or train employees?
If you answered yes to most of the above questions, read on further to find how to select a good wiki software.
Must-Haves in a Private Wiki Software
A wiki that you create will be used by multiple stakeholders to ensure that it has all the right features you need.

Let’s discuss the features that your company wiki must have:
- Collaborative editor: Your wiki software must support real-time collaboration so your team can edit the same document together. You should also be able to add rich media like images, videos, files, etc.
- Organized structure and folders: Workspaces make it easy to collaborate, share information, and ensure the right team members or clients have access to it. You should also be able to organize your wikis into folders for a neat and solid organized structure.
- Store and share company assets: A wiki should have a content library to save images, files, and digital content that you add to your internal wiki so that all can access and reuse them easily.
- Rich embed options: You should be able to easily embed web links, media files, cloud files easily to create interactive documents.
- Search: Search is a key factor in making wikis easy to use. A wiki should allow anyone to easily search documents and would be a bonus if it could search the contents inside documents too.
- Comments: If you need help within a wiki or have queries on it, you should be able to quickly make an inline comment without leaving the document.
- Interlink documents: You need to be able to interlink documents around various topics and subjects to have everything work together making it easier to share knowledge.
- Permission & access levels: Your internal wiki must have the ability to set permission levels to ensure information can be accessed by the right people.
Read more: Easily Integrate a Wiki into Your Site Without Coding Skills
Why Bit.ai is the Best Way to Create a Wiki?
To create wikis, you need a proficient tool that can help you create, share, and collaborate with stakeholders and get work done efficiently. This is where Bit.ai comes in!
Bit.ai is a new-age documentation and knowledge management tool that helps teams to collaborate, share, track, and manage all company knowledge in one place.
With Bit you can easily add images, spreadsheets, Google Slides, YouTube videos, PDFs, maps, charts, graphs, and more to your wikis to make them visually stunning.
Key Features
- Real-time collaborative editor: Bit supports real-time collaboration so your team can edit the same document together. The platform is feature-rich, but has a simple design and intuitive interface, making it easy for a new user to navigate. You can also add rich media like images, videos, files, etc.
- Organized workspaces and folders: Bit brings all your information in one place by allowing you to organize information in workspaces and folders. Workspaces can be created around projects, teams, departments, and clients. Everyone added to a workspace can access and collaborate on its content. Inside each workspace, you can create an unlimited number of wikis and access your content library.
- Content library: Bit has a content library at the workspace level where you can store and share company assets. You can save images, files, and digital content easily for the entire team to access at any point.
- Rich embed options: Bit.ai integrates with over 100+ web applications (Ex: YouTube, Typeform, LucidChart, Spotify, Google Drive, etc) to help teams weave information in their wikis beyond just text and images.
- Smart search: Bit has very robust search functionality that allows anyone to find information quickly. You can search for folders, files, documents, and content inside your documents across all of your workspaces.
- Inline comment and call out: You can make inline comments within a document and ping a user in the workspace. Bit has the ability to send email notifications for comments made on a document. You can also highlight text and use @mention to tag someone on any text within a document.
- Interlink documents: Bit allows users to create unlimited documents and interlink them to create wikis that expand the knowledge base. Simply highlight the words and you have the option to create a new document.
- Permission & sharing access: Bit supports features like document tracking, cloud-upload, templates, document locking, document expiration, password protection, file access restrictions, etc. that help keep your important company information safe.
Read more: 10 Corporate Wiki Best Practices and How to Implement Them?
How to Create a Wiki using Bit.ai?
If you’ve decided that a wiki is the right choice for you, and are looking to quickly create a wiki with a simple interface, great integrations, and no coding headaches! Here’s how you can easily get started with one:
Step 1: Create a Bit Account
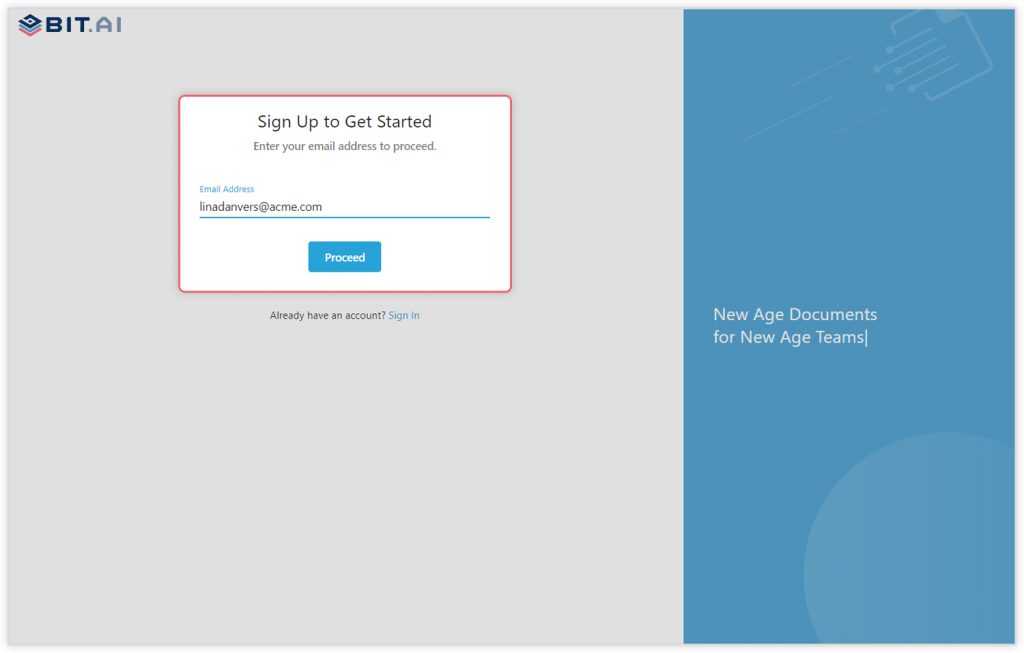 Go the home page of Bit.ai and click on Get Started for Free or Sign Up to get started. Enter your email address to sign up. Once in, you can create your profile.
Step 2: Create a Workspace
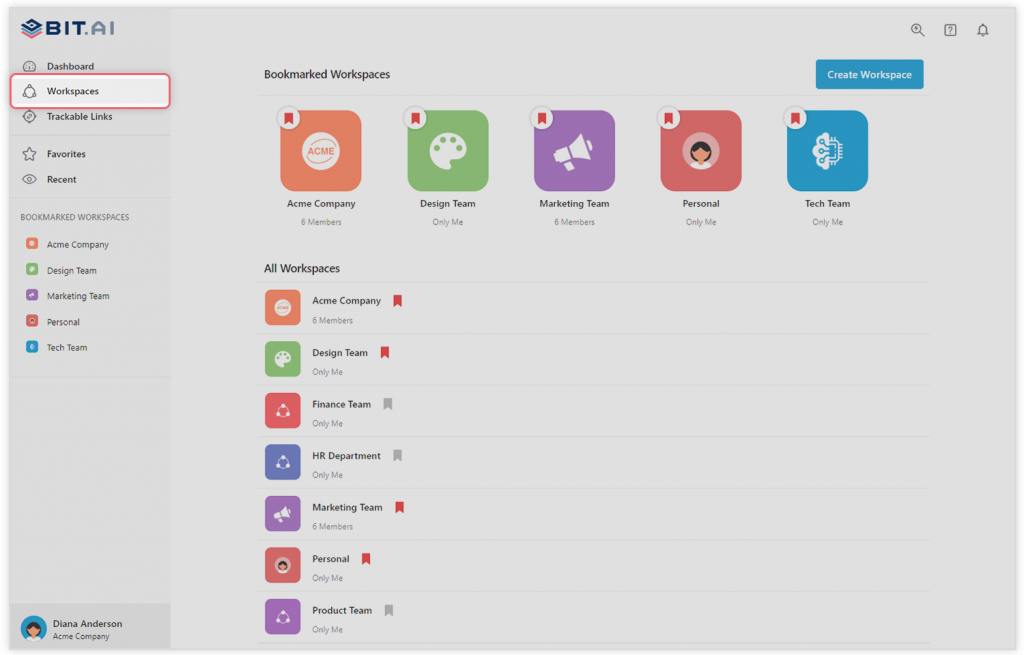 After signing up you’ll be taken to your dashboard, you’ll want to go to the workspace section! Click on the ‘Create Workspace’ button on the right. A popup will show up prompting you to add a name for your new workspace.
You can create a workspace around a team, department, large project, client, partner, etc., and name it accordingly.
Step 3: Add Team Members
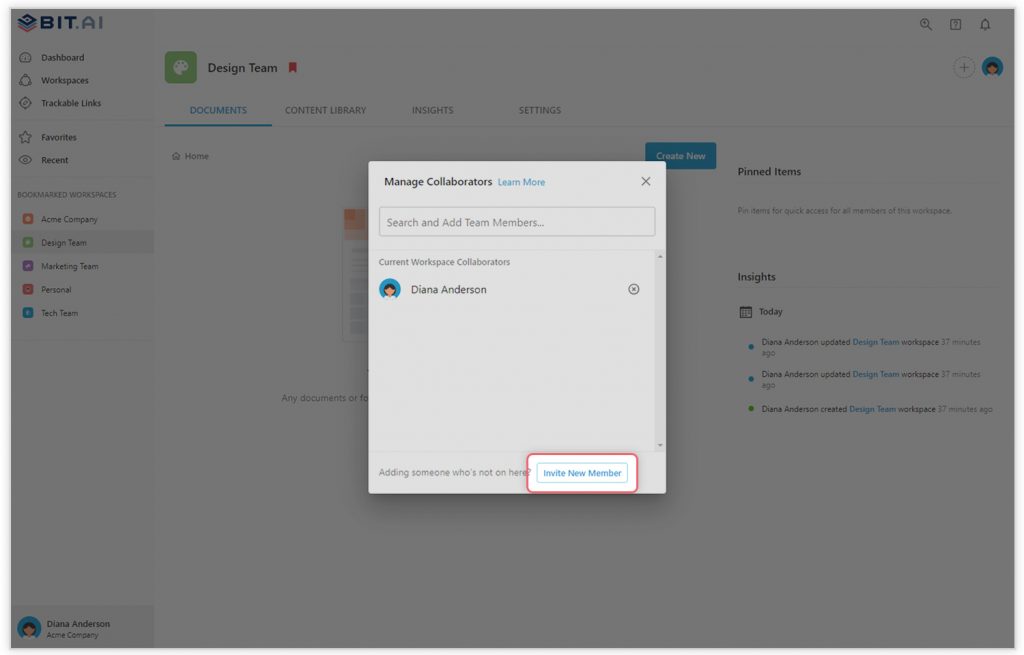 Bit allows your team members to collaborate in real-time and get work done together. You can invite others in your company to join you inside of a workspace and collaborate with the knowledge, projects, documents, and content inside of the workspace.
It’s an easy way to manage projects, create presentations, brainstorm, keep SOPs, create plans, and most importantly, share company information and knowledge!
Step 4: Create Your Desired Document
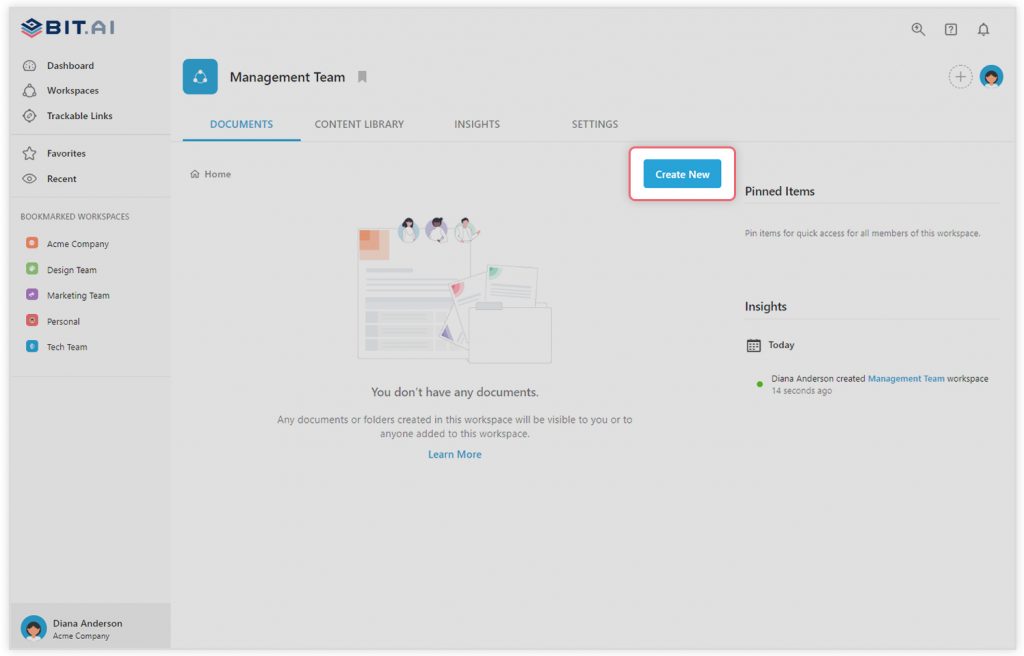 Once you are in the workspace, click on the ‘Create New’ button. You will get a blank Bit document that is ready to use!
Part A: Internal Wiki
Follow these directions to interlink your documents:
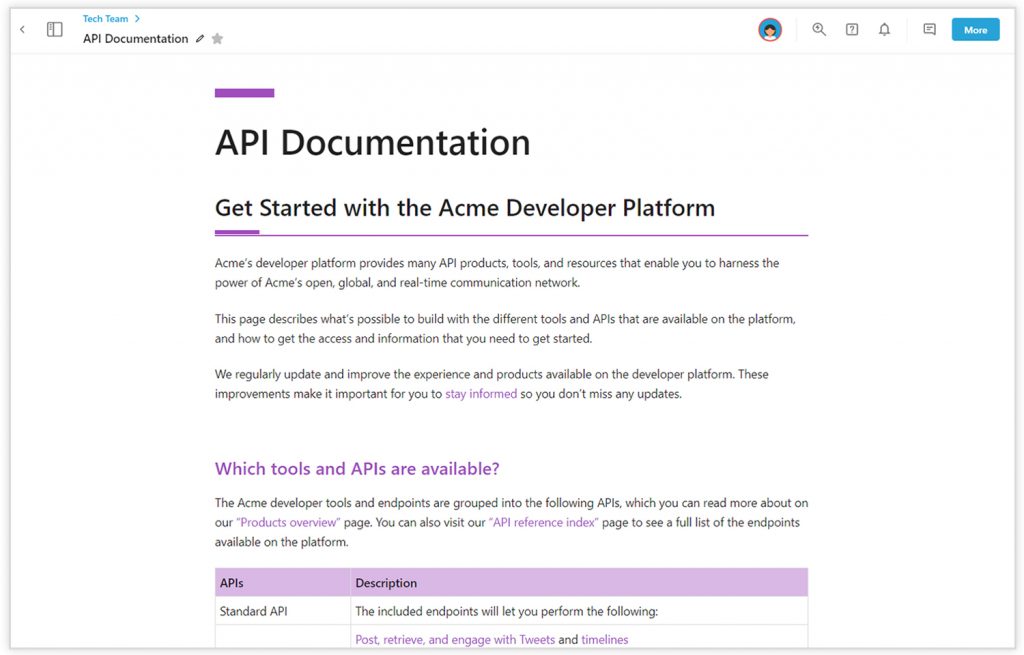
1. Open up a Bit document and start typing.
??2. Highlight any portion of your text.
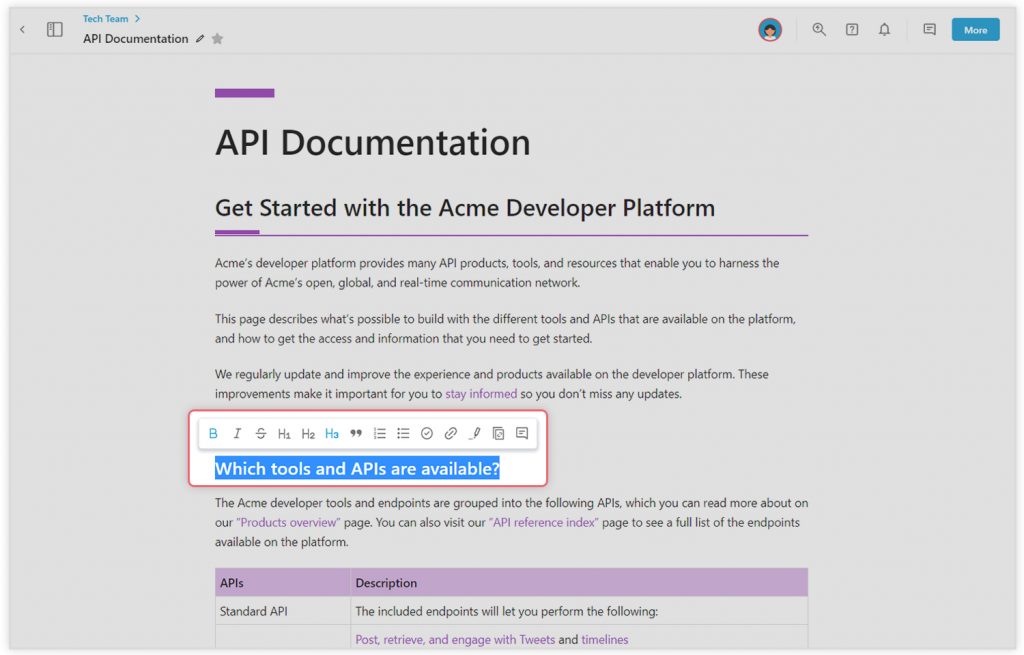
??3. You’ll see a formatting toolbar appear. Click on ‘Link to Document.’

??4. Start searching for any document with this workspace.
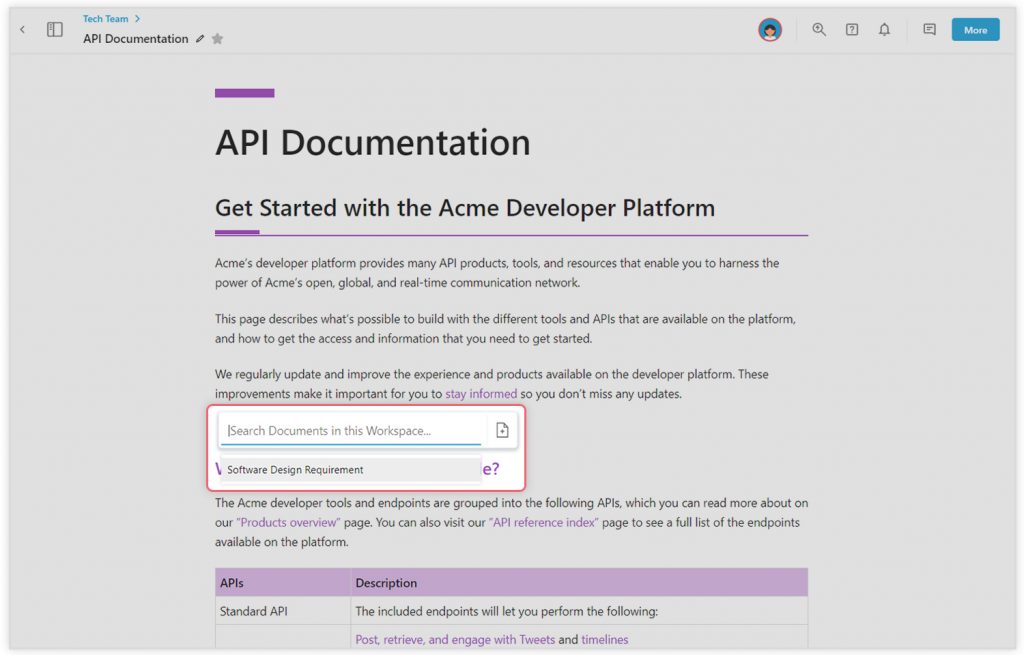
??5. Once you find it you can add it to your document and you’ll see the text you originally highlighted now has a hyperlink taking the user to that document.
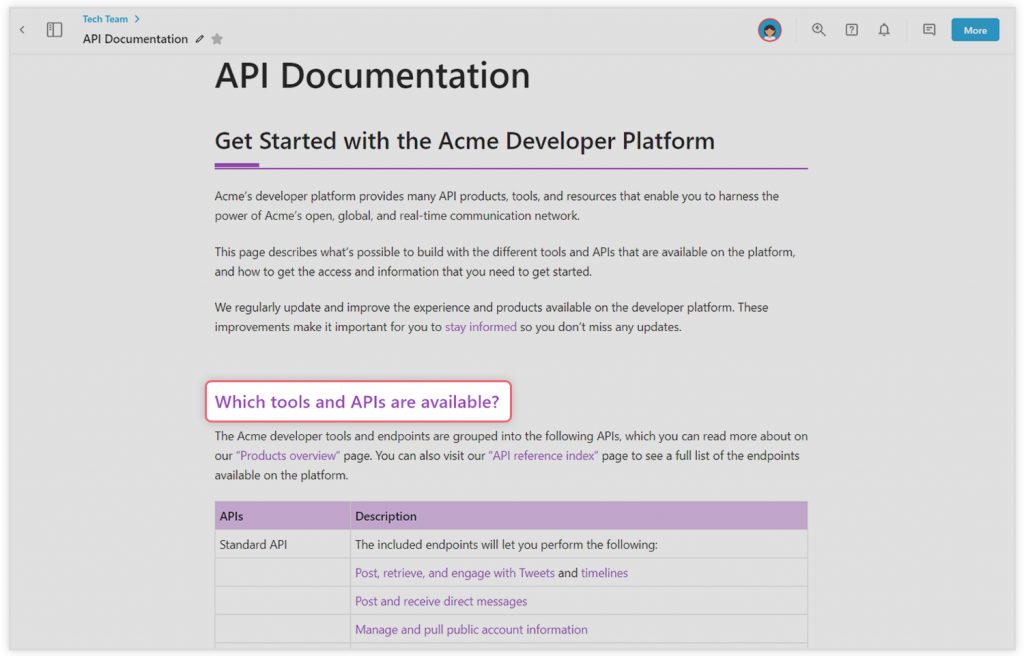 Part B: External Wiki
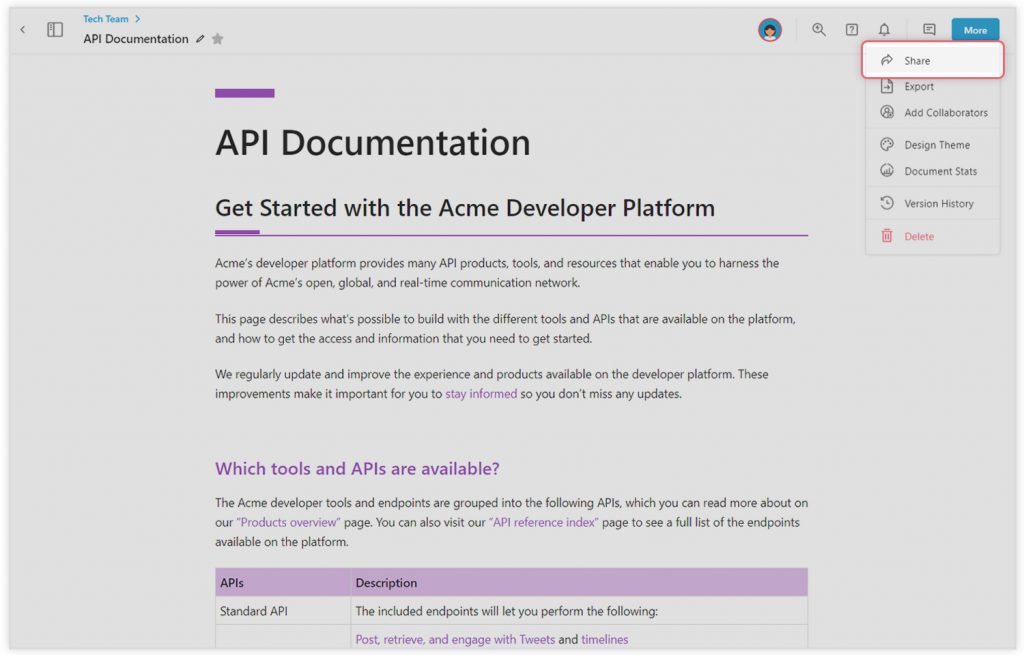
6. ?? From the drop-down select ‘Share.’
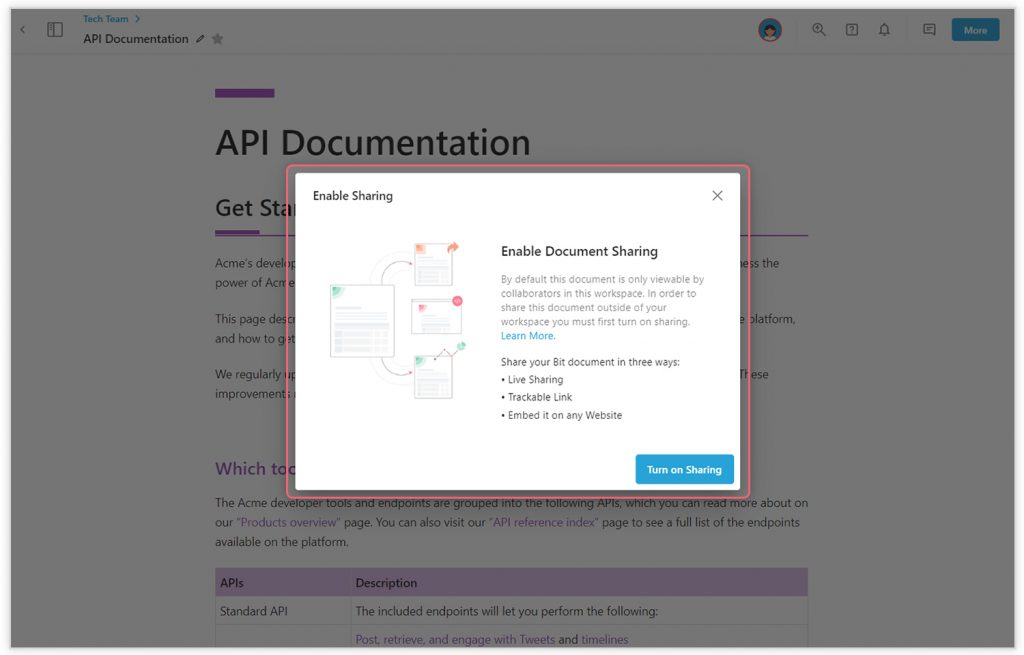
7. ??And enable sharing pop up will open. Click on ‘Turn on Sharing‘.
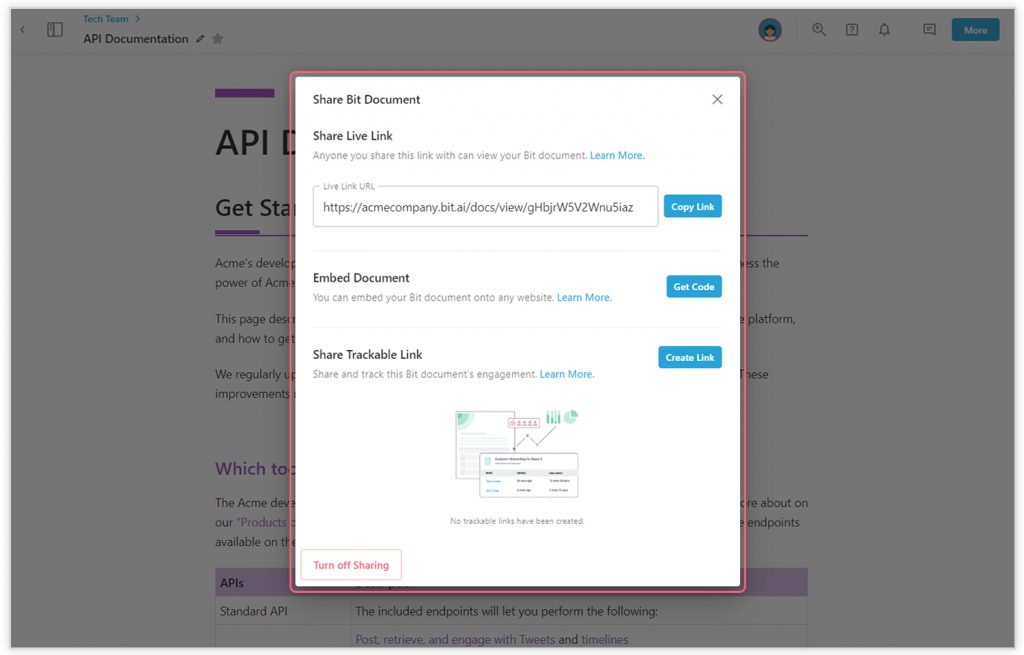
??8. Copy the live link, grab the embed code, or create a trackable link to share this document.
Final Takeaways
Wikis are collaborative pages that can help your company to share knowledge, discuss ideas, and collaborate remotely. Before you create a wiki; clearly define the business purpose, possible use cases, and sharing requirements.
Accordingly, then select the appropriate type of wiki and the wiki software to get the job done. Put in clear security protocols and rules for use. Make sure that you create an organized folder or linking structure so that your teams can expand the knowledge in a productive manner.
If you want an easy solution to create a wiki, try out Bit.ai today! Did you enjoy reading about wikis? Let us know your thoughts by commenting below.