An agency wins a new client, and everyone in the team is happy. Then the first week of work turns into a pile of emails. The client asks where to send the signed contract. Your designer asks for the logo files for the third time. Nobody is sure who the client should contact when something gets stuck.
Without a centralized onboarding process, important information gets lost, tasks are delayed, and both the agency team and the client struggle to stay on the same page.
A client onboarding workspace solves this by bringing all the essential information, documents, and resources together in one place. It is a shared space where the client and your team keep the welcome note, checklist, forms, contract, timeline and contact list for the start of the project.
In this post, we will go through what to include in a client onboarding workspace, how to organize it so that new clients can follow the process without needing constant assistance from your team, and how to set it up using Bit.ai.
What Is a Client Onboarding Workspace?
A client onboarding workspace is a shared online space where your team and a new client keep everything needed to start working together. It holds the welcome note, checklist, forms, contracts, timeline and contacts in one place, so the client always knows what to do next and where to find important information.
However, a client onboarding workspace is not quite the same as a client portal. Although both provide a shared space for clients and teams to access information, they serve different purposes and that difference is what we’re going to find out in the next section.
How Client Onboarding Workspace Is Different From Client Portal
Yes, there is a difference, though the two terms overlap and some teams use the words interchangeably. A client onboarding workspace helps a new client get started. A client portal serves the client for as long as you work together.
| Client onboarding workspace | Client portal | |
| Purpose | Get a new client set up and ready to start | Serve the client for the whole relationship (start to end) |
| Time span | The first days or weeks, up to the first delivery | Months or years |
| What it holds | Welcome note, checklist, intake forms, contract, kickoff notes, timeline, contacts | Invoices, reports, deliverables, support requests, message history |
| Main question it answers | “What do I need to do to get started?” | “Where can I find my stuff and check progress?” |
| What happens later | Gets archived, or becomes the base of the portal | Stays in use as long as the client does |
*Bit.ai lets you manage both client onboarding and ongoing client collaboration in one workspace.
Let’s now look at why keeping onboarding information in a dedicated workspace is more effective than managing everything through email.
Why Use a Dedicated Onboarding Workspace Instead of Email?
Email is useful for quick questions, updates, and one-off conversations, but it is not always the best way to manage an entire client onboarding process. Because onboarding is a set of steps, files and deadlines that a client has to keep track of. In email, all of that is buried inside separate threads.
Here is how a dedicated workspace makes the onboarding experience easier:
- Keeps everything in one place: The contract, the intake form and the kickoff notes live on one page. Nobody has to search their inbox for “the file you sent on Tuesday.”
- The client sees the next step: A checklist shows what is done, what is due and who owns each task. In email, the client has to work this out from the last message in a long thread.
- Reduces repeated questions and follow-ups: Instead of explaining where to upload a logo, whom to contact, or when the kickoff meeting is scheduled every time, your team can add these details to the workspace. Clients can refer to them whenever they need.
- Every client gets the consistent experience. When you build onboarding in a workspace and use the same as a template for each client, everyone receives the same essential information and follows a similar process. In email, the experience depends on who sends the first message and how well they remember every step.

DID YOU KNOW?
Clients also notice how onboarding is handled. In a Wyzowl survey, 86% of respondents said they would be more likely to stay loyal to a business that invests in onboarding content. This highlights how the initial experience can influence a client’s willingness to continue working with a business.
In the end, the goal is never to replace email completely, it’s just to stop using email as the only place where onboarding happens. Keep conversations in email when needed, but give clients a dedicated workspace for documents, instructions, tasks, and everything they need to get started.
What to Include in a Client Onboarding Workspace
A client onboarding workspace should cover the key information and resources clients need during their first few weeks. Each section should serve a clear purpose, helping clients understand their responsibilities, find important documents, and know what to expect next.
Your workspace should bring together the following essentials to make the onboarding process easier for both your team and your clients:
1. Welcome and overview
Start with a welcome page that introduces your agency or business, acknowledges the new partnership, and gives clients an idea of what to expect during onboarding.
This page tells the client what the project is, what happens in the first 30 days and where to start. Add a short note from the person they will work with most, so the workspace feels like it came from a person.
2. Client Onboarding Checklist
A client onboarding checklist helps both your team and the client keep track of the tasks that need to be completed before the project begins. Instead of sending individual reminders, bring all the required actions together in one place, with a clear owner and due date for each task.
Divide the checklist into two sections so responsibilities are easy to understand:
- Client’s responsibilities: Sign the service agreement, complete intake forms, share brand assets, and provide access to relevant tools.
- Your team’s responsibilities: Review submitted information, schedule the kickoff meeting, assign team members, and share the initial project timeline.
This way, both sides know what needs to be done, who is responsible, and which tasks are still pending.

A structured checklist makes it easier to track responsibilities and deadlines.
Explore how to create an effective onboarding checklist that keeps every step on track →
3. Client Intake Forms and Questionnaires
Client intake forms help you collect the information your team needs before starting the project. Use one form to gather details about the client’s business, project goals, target audience, brand guidelines, existing tools, and specific requirements.
This saves your time, avoids multiple follow-up emails, and ensures your team has the necessary information before work begins.
4. Contracts, SOW and Access Details
This part holds the signed contract, the scope of work and the logins or permissions the client needs to give you. You can also include links to documents that require client review or approval. Make sure clients can easily distinguish between documents they need to read, sign, or simply keep for reference.
From contracts and proposals to project updates
Discover which client-facing documents help keep information organized and make collaboration easier →
5. Project Timeline and Key Milestones
Clients should know what happens after they complete the onboarding steps. For example:
| Project stage | What happens |
| Week 1 | Client onboarding and information collection |
| Week 2 | Discovery meeting and project planning |
| Week 3 | Strategy development and initial review |
| Week 4 | First deliverable or project execution begins |
Adjust the timeline based on the actual project scope and agreed deadlines. This gives clients a realistic idea of how the work will progress and when they can expect updates.
6. Team Contacts
Clients should never have to guess whom to contact when they have a question or need help. Add a contact list with the names, roles, and contact details of the people involved in the project.
7. Communication plan
This page states where updates happen (the workspace, email, chat), how often you meet and when the client can expect a reply. Set these rules in week one, so the client does not guess.
Need to establish clear communication expectations with clients?
8. Resource library and FAQs
Collect guides, brand files, past work and answers to common questions. Add a question to the FAQ every time two clients ask it.
7. Kickoff Meeting Notes and Next Steps
The kickoff meeting is where your team and the client align on project goals, expectations, responsibilities, and priorities. Keep a dedicated section for meeting notes so everyone can refer to the same information afterward.
Include the key discussion points, agreed project objectives, outstanding questions, assigned tasks, and next steps. If any decisions or changes are made during the meeting, document them here so they don’t get lost in follow-up emails.
A productive kickoff sets the direction for the entire engagement.
Learn how to plan a project kickoff meeting, align expectations, and get everyone on the same page →
How to Structure a Client Onboarding Workspace
Structure decides whether a client can use the onboarding workspace alone or has to ask you where things are. Follow these five steps to build a workspace that keeps onboarding organized from the first interaction to the first delivery.
Step 1: Map Out the Client Journey
Before creating pages or adding documents, outline the entire onboarding journey. Start with the moment a client signs the contract and work forward to the first major deliverable.
Write down what happens from the signed contract to the first delivery: who does what, in what order. List every question a new client usually asks, like
- What happens after I sign the contract?
- What information or files do you need from me?
- When is the kickoff meeting?
- Who should I contact if I have a question?
- When can I expect the first deliverable?
Each step and each question becomes a page or a section later in your workspace.
Step 2: Group Pages Around Onboarding Phases
Group workspace content according to the client’s journey, not simply by file type. Clients should be able to find what they need based on where they are in the onboarding process.
For example, instead of making clients search through separate folders for documents, forms, and checklists, organize everything into clearly labeled phases:
- Before kickoff: welcome, contract and scope, intake form, access setup
- Week one: kickoff agenda and notes, checklist, team contacts
- First 30 days: timeline, drafts and approvals, communication plan
- Anytime: resource library, FAQs
Step 3: Create a Master Template for Every Client
Build the structure of your workspace once, then copy it for every new client and change only the client-specific details. Every client gets the same layout, and your team always knows where to find things. When you improve the master structure, update it after each onboarding.

Ready-to-Use Templates
Use these ready-to-customize templates to organize client projects, define service expectations, and make collaboration and project handoffs smoother.
Step 4: Set Clear Access and Permission Levels
Not everyone needs access to every page in the workspace. Decide who can view, who can comment and who can edit each page.
For example:
- Clients: Can view project information, complete intake forms, update assigned checklist items, and comment on drafts.
- Project managers: Can edit timelines, assign tasks, manage approvals, and update project progress.
- Internal team members: Can access relevant project files, collaborate on deliverables, and view internal working documents.
- Administrators: Can manage workspace settings, users, permissions, and templates.
Step 5: Assign an Owner and Due Date to Every Task
Every task in your onboarding workspace should have two things: a clearly assigned owner and a realistic due date.
For example, imagine you’re onboarding a new client, Sarah, for a website design project. Your onboarding task list might look like this:
| Task | Assigned to | Due date |
| Complete onboarding questionnaire | Sarah (Client) | November 5 |
| Review client requirements | Emily (Project Manager) | November 6 |
| Share brand assets and website content | Sarah (Client) | November 8 |
| Set up project workspace | James (Web Designer) | November 9 |
| Schedule kickoff meeting | Emily (Project Manager) | November 10 |
| Prepare initial website concepts | James (Web Designer) | November 17 |
If you manage your onboarding workspace this way, everyone knows exactly what they’re responsible for and when it needs to be completed.
Want to make important resources easier for clients and teams to find?
Explore how a knowledge base organizes useful information in one accessible place →
Example: How to Structure a Client Onboarding Workspace
Here’s an example of how you can organize a client onboarding workspace, with separate sections for pre-kickoff tasks, first-week activities, project milestones, and resources so clients know exactly where to find everything at each stage.
Client name: onboarding
├── 1. Start here (welcome, overview)
├── 2. Before kickoff
│   ├── Contract and scope
│   ├── Intake form
│   └── Access setup
├── 3. Week one
│   ├── Kickoff agenda and notes
│   ├── Onboarding checklist
│   └── Team contacts
├── 4. First 30 days
│   ├── Timeline and milestones
│   ├── Drafts and approvals
│   └── Communication plan
└── 5. Resources and FAQs
Now you might be wondering what tool you can use to put it all together and create an organized onboarding workspace. Well, no worries! Bit.ai is an AI-powered workspace where you can bring your client onboarding documents, tasks, and resources together in one place. Let’s explore more about it in the next section.
How to Build a Client Onboarding Workspace in Bit.ai
Bit.ai is an AI-powered document collaboration and knowledge management platform where you can create workspaces, build documents and wikis, and bring information from different sources together.
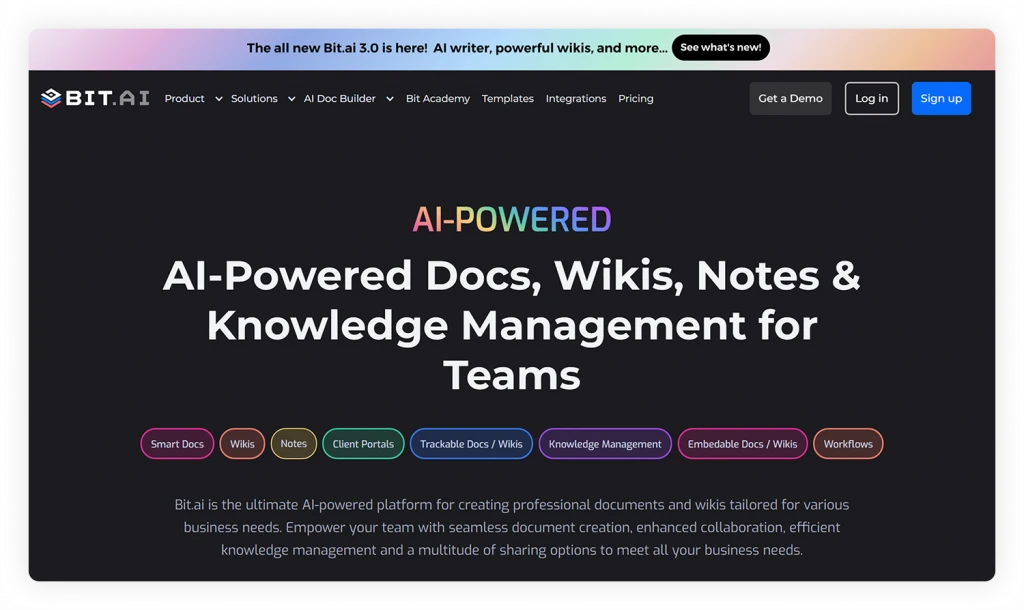
Here are the amazing Bit.ai features you can use to organize your client onboarding process:
- Workspaces and folders: Create a separate workspace for each client and organize documents into folders and subfolders.
- Docs turn into a wiki: Add subpages to a document, and it becomes a wiki with a navigable content tree.
- Embeds keep forms and files in one place: Bit supports 100+ integrations, with live embeds from tools such as Typeform, YouTube, Google Sheets, Figma, and more.
- AI Genius Writer: Use the AI writing assistant to create document drafts, outlines, and other onboarding content.
- Real-time collaboration: Invite team members and clients to collaborate on documents, leave comments, and share feedback.
- Sharing works for outsiders: You can share a live link, a trackable link or an invite-only workspace for guests, with password protection and expiration dates.
Now, let’s walk through how to set up your client onboarding workspace in Bit.ai.
How to Set Up Your Client Workspace In Bit.ai (Step by Step)
Step 1: Create a Dedicated Workspace for Your Client
Sign up for Bit.ai and create a new workspace. Name it after your client or project, such as Sarah’s Website Design Project. This will be the central place for all client-related onboarding information.
Step 2: Create Folders for Different Onboarding Stages
Within your workspace, create folders and organize the content, such as Before Kickoff, Week One, First 30 Days, and Resources & FAQs. This makes it easier for clients to find information at each stage.
Step 3: Create and Add Onboarding Documents
Now, start adding the actual content to your workspace.
Use Bit.ai’s document editor to create important onboarding documents, such as welcome guides, intake forms, project briefs, onboarding checklists, and communication guidelines. You can also use Bit.ai’s templates and AI writing assistant to create document drafts.
Step 4: Turn Related Documents Into a Structured Wiki
If your onboarding process involves several documents and resources, you can use Bit.ai’s Wiki feature to connect them into a structured knowledge hub.
For example, create a main wiki called Client Onboarding Guide and add subpages for the welcome guide, project timeline, communication guidelines, FAQs, and other important information.
Step 5: Invite Your Client and Team Members
Once your workspace is ready, invite your client and the relevant team members to collaborate. Bit.ai offers different guest access and permission options, including read-only and comment-only access, so you can control what clients can see and do.
Step 6: Share the Workspace and Keep It Updated
For a simple setup, send a link with a password and an expiration date. For a more private setup, create an invite-only workspace and invite the client as a guest, who logs in to view it.
And that’s it! Your client onboarding workspace is ready. No more hunting for files or answering “Where can I find this?” emails!
Ready-to-Use AI-Prompt
Creating onboarding documents, checklists, and communication guidelines from scratch can take time. Use these AI-powered tools to generate essential client onboarding content and organize your workflow:
Client Onboarding Workspace Best Practices
A client onboarding workspace can quickly become cluttered with outdated documents, unnecessary folders, and information nobody knows where to find. To keep things running smoothly (and avoid turning your workspace into another digital mess), follow these best practices:
1. Send the link in the first email, and nowhere else after that
Put the workspace link in the same message that follows the signed contract with your client. After that, when a client emails a question, reply with a link to the page that answers it. Clients learn quickly to look there first.
2. Write for Someone Who’s New to Your Process
Don’t assume clients already know how you work. Avoid internal jargon, unexplained abbreviations, or terms that only make sense to your team. Use simple, clear language and explain what each step involves.
For example, instead of writing “Submit all assets before project initiation,” say “Upload your logo, brand guidelines, product images, and website content before we begin designing your website.”
3. Keep client-facing and internal information separate
Not every document needs to be shared with clients. Keep internal notes, team discussions, and confidential files separate from client-facing resources. Review access permissions before inviting anyone.
4. Mention how long each task takes
Clients are more likely to complete tasks when they know how much time they’ll need. Don’t just tell clients what they need to do; give them an idea of how long it will take.
For example:
- Complete the onboarding questionnaire (10 minutes).
- Upload brand assets and logos (5 minutes).
- Review and approve the project brief (15 minutes).
These small time estimates make the to-do list less intimidating and help clients fit onboarding tasks into their schedules instead of putting them off for later.
5. Review the workspace after every onboarding
Once a client completes onboarding, take a few minutes to review the workspace. Ask the client, “What was confusing?” Check which tasks ran late and which questions still came by email.
Remove outdated information, fix unclear instructions, and update checklists wherever needed. This way, every new client gets a smoother onboarding experience than the last one.
6. Decide what happens when onboarding ends
Onboarding shouldn’t just stop once the client completes the initial tasks. Clearly explain what happens next, whether it’s moving into project execution, scheduling the first progress meeting, or sharing the initial deliverable. Add these next steps to your workspace so clients know what to expect and how the project will move forward.
The idea is to make onboarding easier for both you and your clients, not to add another layer of work. So, keep your workspace simple, update it regularly, and make sure clients always know what to do next.
Common Client Onboarding Workspace Mistakes to Avoid
Even a well-planned onboarding workspace can become confusing if a few important things are overlooked. Here are some common mistakes to watch out for when setting up and managing your onboarding workspace.
- Adding too many folders: Keep the structure of your workspace simple so clients can find documents without clicking through endless folders.
- Dumping all documents in one place: Group related documents, forms, and resources instead of creating a cluttered file dump.
- Using unclear folder names: Choose descriptive names instead of vague labels like “Miscellaneous” or “Project Stuff.”
- Sharing internal documents with clients: Keep internal notes, team discussions, and confidential files separate from client-facing content.
- Leaving tasks without owners or deadlines: Assign a responsible person and a clear due date to every task.
- Forgetting to update documents: Remove outdated files and replace old versions to avoid confusion.
- Not explaining what happens next: Clearly outline the next steps so clients know what to expect once onboarding is complete.
In the end, remember, the goal is to build an onboarding workspace that clients can actually use without needing a personal guide every time.
Conclusion
A smooth client relationship starts with a well-organized onboarding process. When clients know where to find their documents, submit information, and contact your team, the project can move forward without unnecessary delays.
Before you build yours, remember these few things about client onboarding workspace:
- Include the essentials: a welcome page, checklist, intake forms, contract, timeline and team contacts.
- Organize by phase: before kickoff, week one and the first 30 days.
- Give every task one owner and one due date, so nothing waits on someone who doesn’t know it’s theirs.
- Set permissions, so clients see only what they need and your internal notes stay private.
- Review after every onboarding and fix whatever confused the client.
So, start with your next new client: build the workspace, send the link with the signed contract, and count how many emails you no longer have to answer!!
FAQs About Client Onboarding Workspace
What should I include in a client onboarding workspace?
Include a welcome page, kickoff notes, an onboarding checklist, the contract and access details, a timeline, team contacts, a communication plan, a resource library with FAQs, and one place for feedback and approvals. Start with the welcome page and checklist, then add the rest as clients ask for them in your onboarding workspace.
How is a client onboarding workspace different from a client portal?
An onboarding workspace guides a new client through the first weeks of interaction, from signing the contract to receiving the first project deliverable.
A client portal, on the other hand, is a dedicated space where existing clients can access project updates, shared files, invoices, reports, and support options throughout their working relationship with your agency. Small teams can use one workspace for both, and add a portal when they need billing or ticketing.
Do I need a separate workspace for each client?
Yes, give each client their own workspace, so they see only their own contract, files and contacts. Build one master version of documents, copy it for each new client, and change the name, dates and owners. This keeps client information private while keeping the onboarding process consistent for everyone.
How do I share the workspace with clients safely?
Share each workspace only with the people who need it. Use a password and an expiration date on shared links, or invite the client as a guest who must log in to your workspace. Set view, comment, and edit permissions for each page based on what clients need to do. Keep internal notes on restricted/locked pages that clients cannot access, and never store passwords in the workspace.
Can I use Bit.ai for client onboarding?
Absolutely, Bit.ai provides a centralized AI-Powered workspace where you can organize and manage your entire client onboarding process. You can write onboarding pages as a document or wiki, embed forms and files, and share them with a link or invite clients as guests to your workspace.
About Our Editorial Team
Our Editorial Team researches, writes, and reviews every article to help ensure it is accurate, practical, and up to date. To learn more about our editorial standards, content review process, and official social media profiles, visit our Editorial Team page.
Why Trust This Article?
The information in this article is based on reputable and authoritative sources. We review our content periodically to keep it accurate and up to date.